Spellbinders—Be Bold Blooms Hello Card

Happy Thursday!
Today I’ve got a fun floral card to share with you. If I’m being honest, I’ve had this Be Bold Blooms die set in my ‘to use’ bin for probably a year now because I’ve been too intimidated to use it. What made me feel intimidated was more or less having to choose a color palette to work with with all these various floral elements. I felt overwhelmed, so I left in it the bin until a couple days ago. Lately I’ve been finding myself drawn to retro color palettes or jewel tones, so I decided to stick with those here that way I didn’t have to think too hard about colors and I could just get crafting.
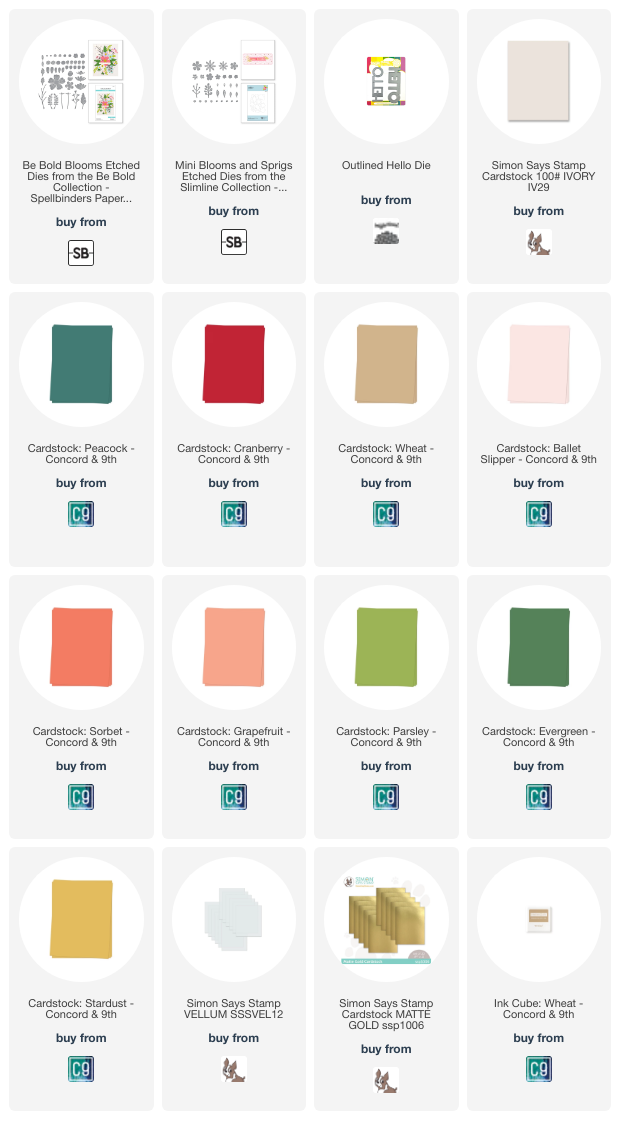
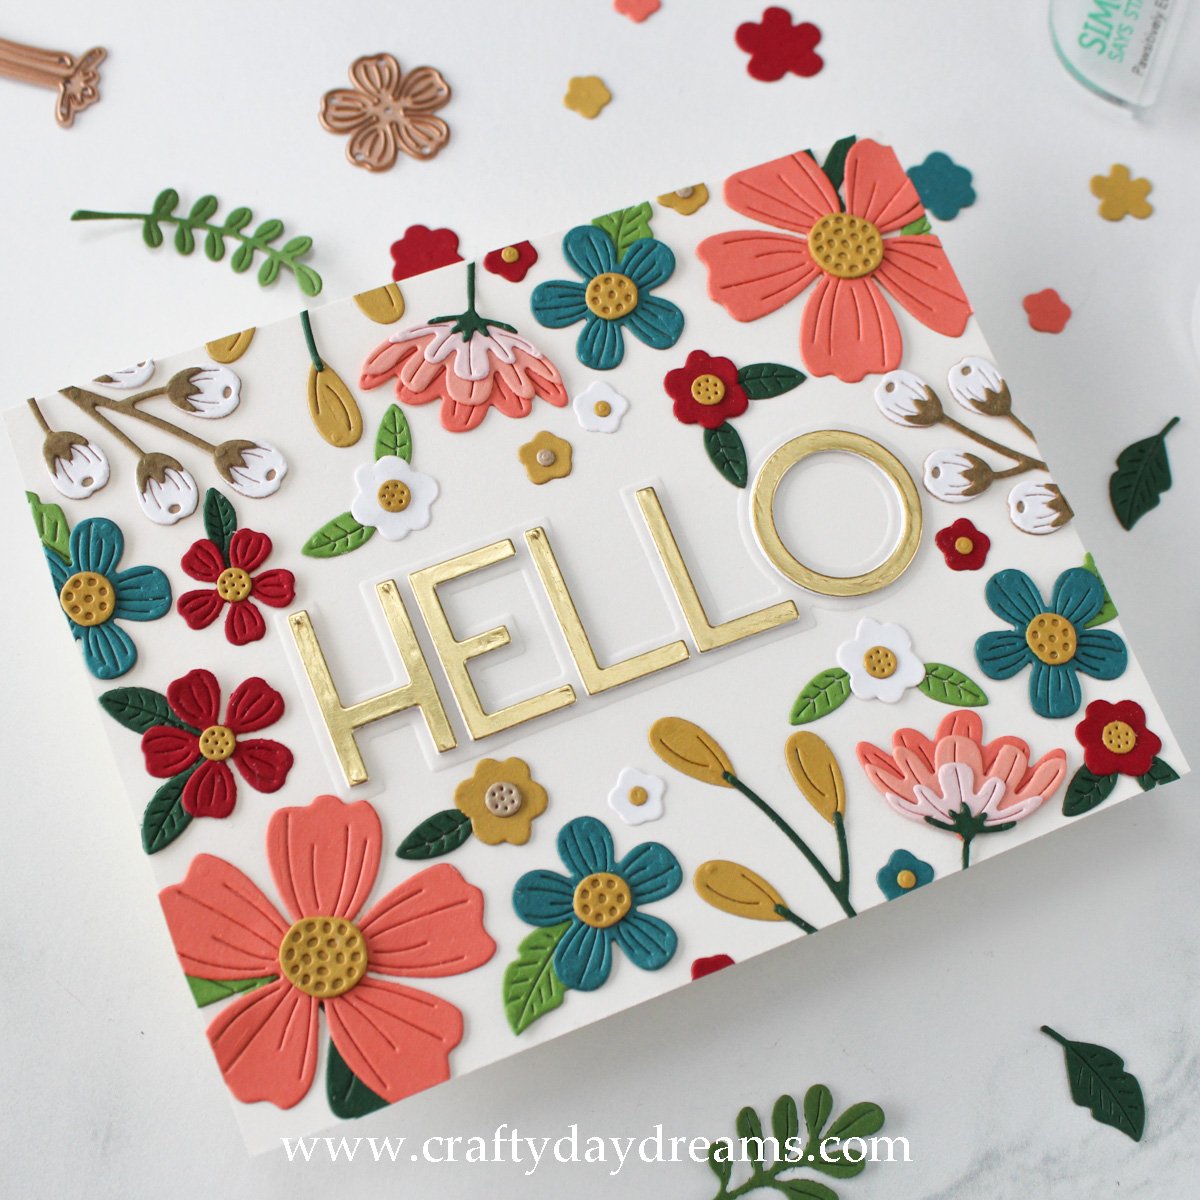
So I pulled out Sorbet, Peacock, Cranberry, Evergreen, Parsley, and Stardust cardstocks from Concord & 9th. These colors have the same tone to them as well as the same saturation, so they work really well together. I decided I wanted the largest flower to be Sorbet cardstock and that the supporting florals would be Peacock and Cranberry cardstocks. The leaves were die cut out of Evergreen and Parsley cardstocks and I mix and matched which flowers had which based on how they looked together and how the tones played off each other. Peacock looks great with Parsley, so I paired them together, Evergreen and Cranberry have the same strength so they look great together, and I decided to split the Sorbet flowers with Evergreen and Parsley leaves so that there weren’t too many of the same colored leaves next to each other and for variety.
For the layered flower, I die cut it out of Sorbet, Grapefruit, and Ballet Slipper cardstock and finished it off with an Evergreen stem. The larger buds were die cut out of Stardust and the stem out of Evergreen, and the smaller buds were die cut out of white cardstock. The stem for the smaller buds was die cut out of Wheat cardstock, but because I wanted a deeper color I took my Wheat ink pad and smooshed it over the die cut. This darkened it up perfectly! Since I wanted a couple more medium and small sized Cranberry flowers, I pulled out the Mini Blooms and Sprigs die set, also from Spellbinders.
I also ended up die cutting the smaller set of leaves and the cluster of flowers die from the Mini Blooms and Sprigs die set. This die cuts out 5 flowers at once, and I really liked the small ones as filler, so I die cut them out of Cranberry, Stardust, Peacock and white cardstocks. To add a flower center to these, I used the floral detail/layering die in that die set and saved the fall out dot (I know this doesn’t make sense, but I think it would if you saw the die!).

With all of my elements die cut, I got to work on the sentiment. I’ve had this Outlined Hello die from Waffle Flower in my stash for a bit and I decided to bust it out for this card! So I die cut the shadow out of Simon Says Stamp heavyweight vellum, and the letters out of SSS matte gold cardstock and two layers of white cardstock. Since everything was ready to go, I decided to start building everything on a A2-sized piece of SSS Ivory cardstock. I really like the warmth this brings to the florals and the sentiment. Originally, I had planned to make more of a pattern on this background, but once I started playing around with the floral elements, this was how the card turned out. One thing to be mindful of when arranging florals around a focal point is to make the opposite side/corner is similar but different. This could be slightly tweaking what you have, in my case I added a sprig of buds next to the upper right Sorbet flower instead of a medium sized red flower, and doing this helps to make sure that your eye isn’t immediately drawn to that and noticing the similarity.
After lots of placement tweaking, I glued everything down. I definitely could have made my life easier by using Press’NSeal, but since there were so many layers I felt it would be easier to glue things down one at a time, especially since I didn’t want to put glue on everything and then placements get wonky and I couldn’t fix them before the glue dried.
So that wraps up this post! I don’t have many tips for you regarding placement other than to play around and I’m sure you’ll find an arrangement you like! These die sets are super fun, but I think I’m ready to shove them in a bin and not touch them for a while—this was enough for me for a bit 😅. Thank you for stopping by the blog today, I hope to catch you next time with more inspiration!
Also, if there are certain things you want to see from me, drop me a comment down below or send me an email!
Affiliate disclaimer: all links to Waffle Flower, Altenew, Scrapbook.com, and Spellbinders products are affiliate links. These links allow me to get a commission at no extra cost to you if you use them to shop! All other links provided are links to supplies and shops I am not affiliated with and I do not get a commission from.