

Waffle Flower—Bookish Anniversary Card
Hi, friends!
I’m back today with a sweet anniversary card I made for my husband, Alex, and I’s fifth wedding anniversary! Our anniversary was actually on the 4th of January, but I’m so behind on my posting and editing thanks our cross-country move! We’ve made it back to Michigan, but we’re actually in the process of building our forever home, so we’ll be living with my brother for a bit, but we’re so excited to be back with family! So, I apologize for having some large gaps in my content, I’m hoping to get back on track with my blogging and YouTube-ing!
Back to this card! In November, Waffle Flower released the cutest book-themed products—I’m talking stamps, dies, stencils, and a subsentiment diecut. When I saw the subsentiments diecut (the preprinted and cut sentiment strips WF sells), I just knew they would be perfect for an anniversary card for my husband. If you have been following me on Instagram, you may have seen for my birthday in November that Alex took me on a book shopping trip where I had the goal of picking up 28 books for my 28th birthday. I ended up getting about half that amount haha, but since then I’ve joked that Alex is my book dealer. All that to say, this collection was exactly what I needed to make a card that was ‘us’ for our anniversary.

I started this card deciding to use the same color palette I had with two cards I made using the Sweater Season bundle: Briar Rose, Ballet Slipper, Stardust, Ivory (SSS), and Fern (TSM). Not only do I love this color palette in general, but this was also a hint to my husband 🤭! In our new house we’re going to have a library room, and I’ve been telling him that I really want to paint our bookcases a gorgeous sage green. He’s not really on board with that task yet, but here’s to hoping this card would convince him and let him visualize it!!
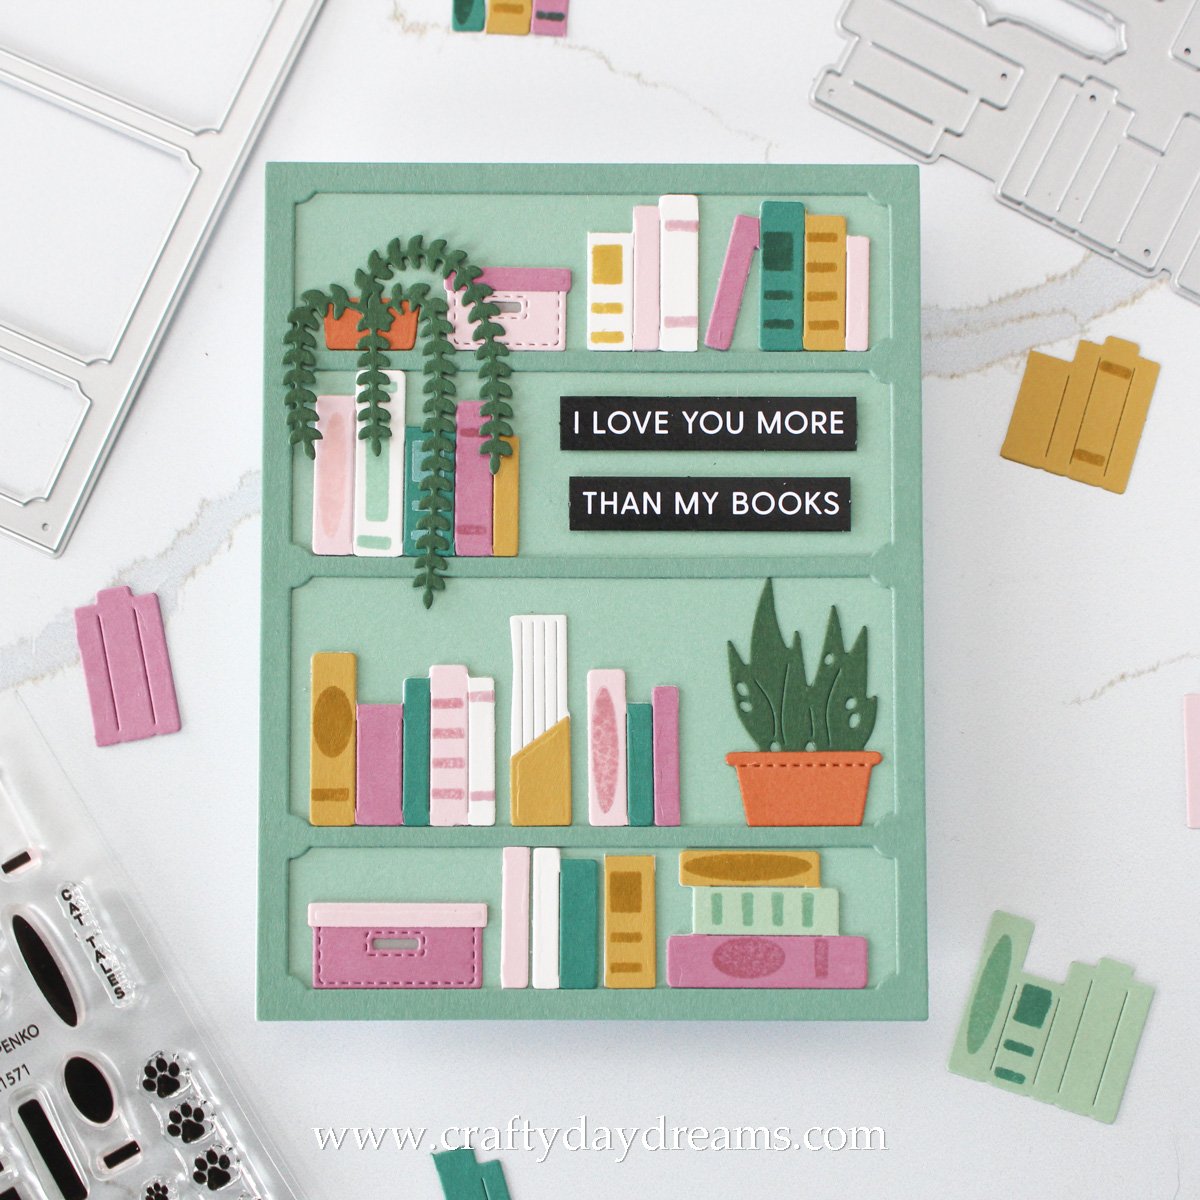
Since I knew I wanted the bookcase to be sage green, I die cut Fern cardstock twice using the Simple Shelves die. I decided I wanted to add a subtle hint of, I guess, faux dimension to the scene by using Sage cardstock as the backer to the bookshelf. This slight variation in color definitely helps to differentiate between the front of the bookshelf vs the back wall of it (but I guess in real life, those colors might actually be switched since the inside of the shelves would likely be darker due to shadows and all that, but I digress!). To add a little bit more dimension to the bookcase, I die cut another out of the same Fern cardstock and glued the two together.
At this point, I could get to the fun part, which for me was die cutting all the books and shelf extras! I used the Cat-a-log die to cut out books in Ballet Slipper, Briar Rose, Juniper, Stardust, and Ivory cardstocks. You may notice one book that is cut out of Sage cardstock, after I glued it down, I decided it was too light and blended in too much, so that’s why I ended up using Juniper cardstock instead. I used the coordinating stamp set to add little book details onto my books with the matching ink colors, then snipped books apart and added them to a base die cut of books. I might be doing a bad job at explaining this, but I built all my books up on a white die cut of books for a little more dimension and stability.
Before arranging the books on the shelves, I pulled out two more die sets to add a bit of fun to the shelves: the Shelves Add-on die (new from November), and the Shelves Additions die (this one was released maybe a year or two back). From the Shelves Add-on die set, I die cut the drooping plant out of Jade cardstock from The Stamp Market, and the pot out of Spiced Cider cardstock. I also used the magazine holder die and cut it out of Ivory and Stardust cardstocks. From the Shelves Additions die set, I die cut the snake plant out of Jade and Spiced Cider cardstocks, then the little storage boxes out of Ballet Slipper and Briar Rose cardstocks. I love how cute these little elements are!
With all my bits and bobs ready to go, I got to assembling! First I glued my Fern cardstock shelf to my Sage piece of cardstock. I played around with arrangements, trying to make the shelves feel as full as possible and balanced color-wise, while also leaving a gap from my sentiment. Once I was happy, I glued everything down.
Now for the sentiment! I’ve said it before, and I’ll say it again, but I loooove the Subsentiments Die Cuts that Waffle Flower releases. Think of the Simon Says Stamp pre-printed sentiment strips, but better! With the sentiments from Waffle Flower, there is no cutting involved! All you have to do is gently peel the sentiments apart and run a black marker around the edges, and boom, your sentiment is ready to be slapped on a card. For this card, I chose the ‘I love you more’ ‘than my books’ sentiments and popped them up on some thin foam squares and stuck them down in the open area on the second shelf. I absolutely love this sentiment, and my husband knows how much weight it carries haha!
These products are fabulous for book lovers like myself, so stay tuned because I will have two more cards featuring these products and a couple more! Thanks so much for stopping by the blog today, I hope to catch you next time! 😊
Affiliate disclaimer: all links to Waffle Flower, Altenew, Scrapbook.com, and Spellbinders products are affiliate links. These links allow me to get a commission at no extra cost to you if you use them to shop! All other links provided are links to supplies and shops I am not affiliated with and I do not get a commission from.
