

Waffle Flower—Folk Art Christmas Card

Happy Thursday!
Today and tomorrow I’ll be sharing some quick and easy Christmas cards with you, and today features the Folk Art background die and coordinating stencil. These products are from Waffle Flower, and I love them! Not only can you use them both separately, but you can also use them together for a fun look. I had actually die cut this panel a couple weeks before I used it because I was originally planning to make an elegant version of this card with black cardstock behind the Wheat panel, white pigment snowflakes, and the ‘joy’ from the oversized happy joy die set. However, I’m pretty pleased with how this card turned out because, hello, look at all that gorgeous color!!! Both options make fabulous cards either way!
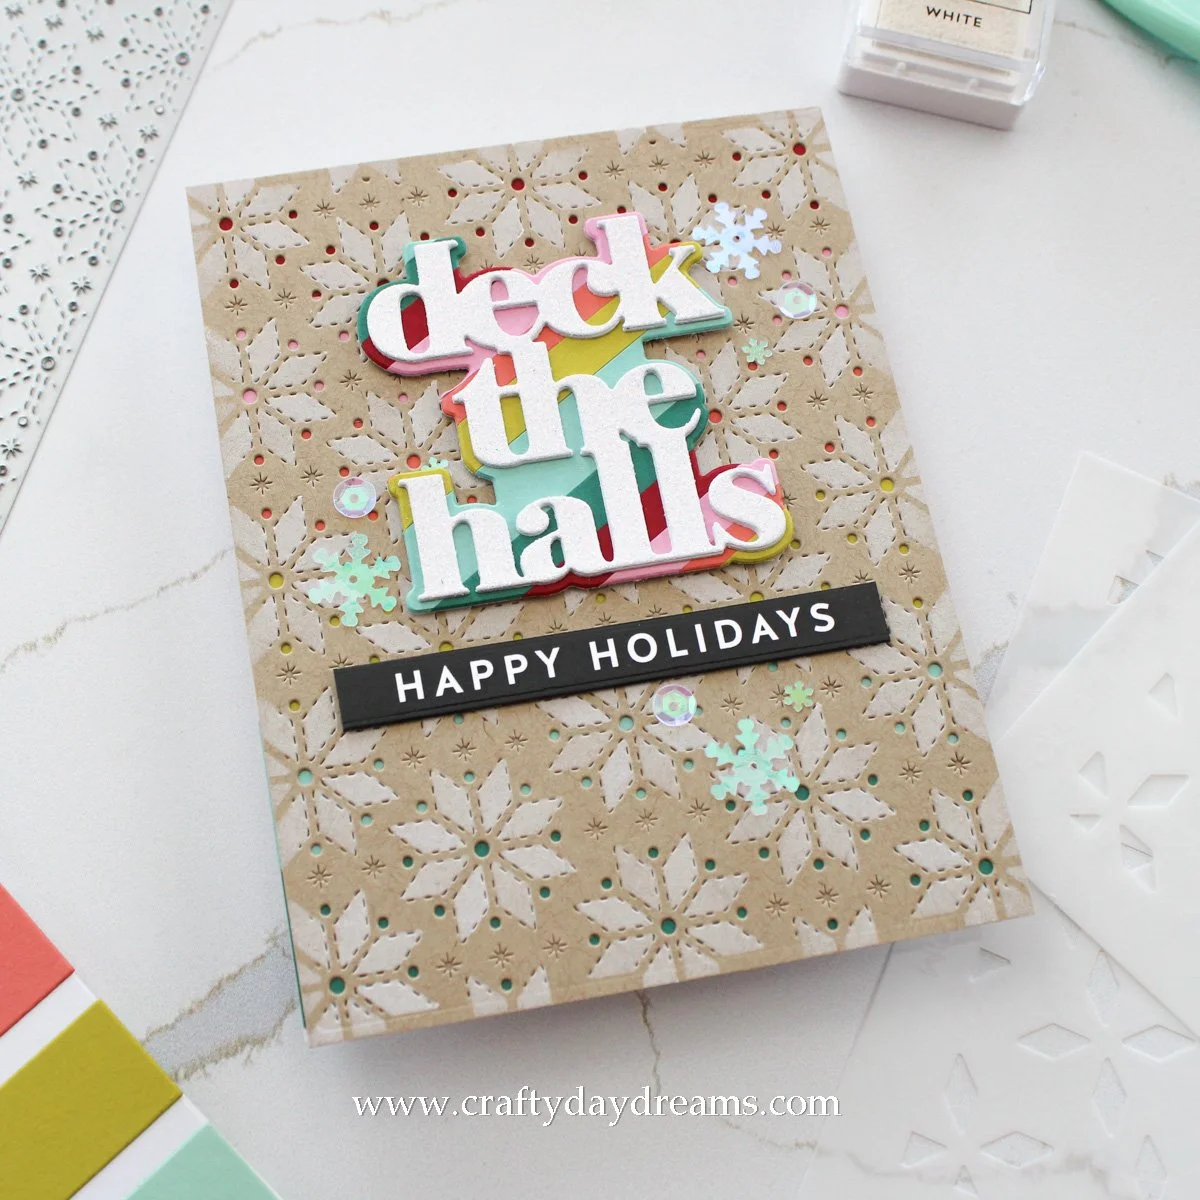
Since I knew I wanted my snowflakes to be stenciled in with white pigment ink, I did that first. I pulled out my 8.5 x 8.5-inch grip mat and stuck it down on my glass mat. I absolutely love using this particular size grip mat when it comes to stenciling since it holds the edges of your stencils so well. So I lined up and blended on Concord & 9th white pigment ink to both of the snowflake stencils using a blending brush. After hearing Jennifer McGuire recently say that dabbing the ink on seems to work better than blending, I tried a bit of both motions, and I agree with what she said! Dabbing/pushing the ink on definitely gives you a more opaque look than blending, so keep that in mind!
With my panel drying, I got to work figuring out a color palette. I was once again inspired by a pin I found on Pinterest, so I put together a color palette of Cranberry, Carnation, Sorbet, Lemongrass, Sea Glass, and Juniper. I absolutely love this color palette, there’s just something about these colors together that just makes my heart sing! Now that I knew what colors I wanted to use, I really wanted to tie them into the card in a way besides the greeting, so I decided to glue strips of cardstock (I think I cut them to 0.75-inch or so) on a card front and glue my stenciled panel on top of it. I thought about using a white panel with the Folk Art background die, but surprisingly, the colors stood out way more with the Wheat panel than the white, you really didn’t notice the colors with the white panel laying over them.
I wanted my greeting to have some color to it, but I didn’t want to decide on one or two of the fabulous colors in my palette, so I decided it was time to Strip it Up, as Laura Bassen says! I cut strips of each color and tried to vary them in width a little bit, some were 0.5-inch, 0.25-inch, or somewhere in between. Carissa Wiley said she likes to vary the thickness of her stripes because it looks visually appealing, and I hadn’t tried it before, but I love it! It really does switch things up a bit and make it more exciting to look at. I glued these strips on a scrap piece of cardstock, then die cut the shadow of the ‘deck the halls’ greeting from the Holiday Sayings die set out of it. For the words, I decided that C9 white glitter paper was the way to go, so I die cut a layer out of that and a few more out of plain white cardstock to build up some dimension. I absolutely love how this greeting looks!!
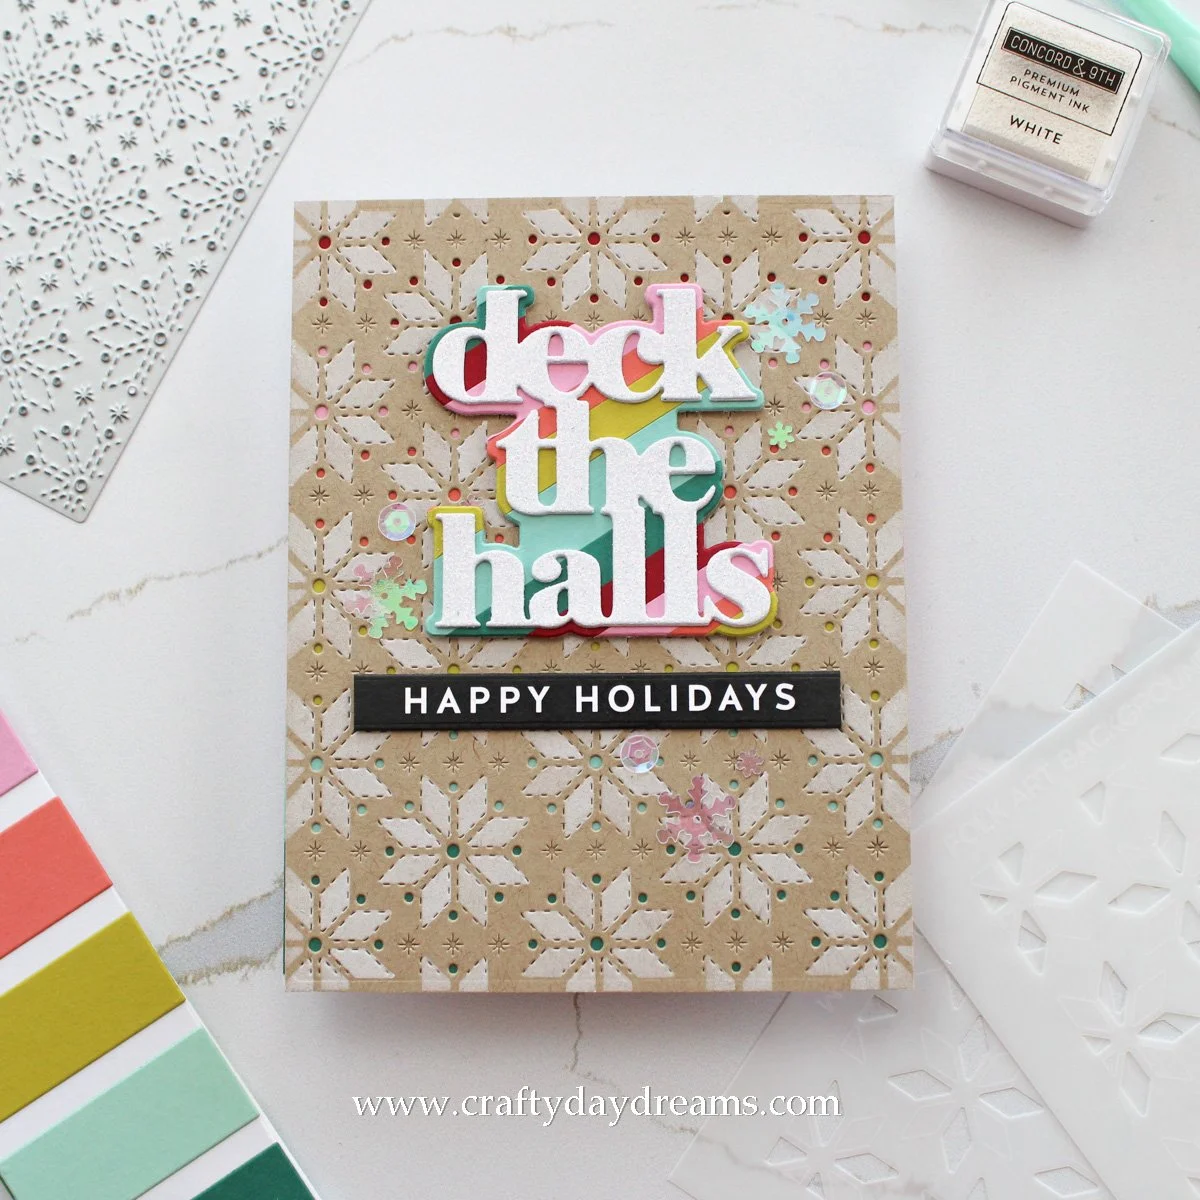
Since the card felt a little too empty to me and I wanted something to take up a bit more space, I reached for some reverse sentiment strips from Simon Says Stamp, specifically the reverse Holiday set. I used a sentiment banner die I had on hand and die cut the ‘happy holidays’ out of the sheet and trimmed off the excess. I stuck my greeting down with some thin foam squares beneath it, then added a couple thin cardstock strips to the back of the sentiment strip and glued it down below it. I wanted a little bit of shine on this card, so I pulled out two embellishment sets from Buttons Galore & More— Avalanche and Packed Powder. I chose to use both of these because they had different snowflakes and I wanted to use two sizes of snowflakes. Since there were only the two sizes, I opted to add a third sequin from one of the mixes to balance out my arrangements. I love the soft iridescence that these embellishments add to this card, it’s a nice, yet at times subtle, touch.
Well that wraps up today’s post! Tomorrow I’m wrapping up my card series with a very simple Christmas card that is perfect for last minute making—I’ll give you a hint on the technique: oxide resist. Thanks so much for stopping by today, I’ll catch you tomorrow!
Affiliate disclaimer: all links to Waffle Flower, Altenew, Scrapbook.com, and Spellbinders products are affiliate links. These links allow me to get a commission at no extra cost to you if you use them to shop! All other links provided are links to supplies and shops I am not affiliated with and I do not get a commission from.
