

Concord & 9th— Bonus Whimsical Wings Cards!

Hi, Friends!
Welcome back to the blog! I hope you had a wonderful Thanksgiving and got to take advantage of some crafty sales! I had hoped to share these cards with you last Friday, but I was not feeling well and had a couple of doctor’s appointments over the past week. But I am feeling good again and have gotten back to crafting!
This post is going to focus on three bonus cards I made using the Whimsical Wings bundle, which I am in LOVE with!! If you haven’t caught my last post where I introduced (read: gushed over) this bundle and gave a few tips, feel free to check it out! I really love how versatile the products are and I’m sure it will be one that I’ll be using for a long time.
Heat Embossed Butterfly

First and foremost, I love how this card turned out!!! After making the blue butterfly card with this bundle, this idea immediately popped into my head. I was originally making this card as a ‘welcome baby’ card, but as I glued the butterfly down on the card front, I couldn’t get myself to slap a sentiment on it. At that point, I decided to leave it without one because the card itself is beautiful enough without the sentiment, but I also had the idea that this could be wall art in a kid’s room! How beautiful would this panel look framed and hung on a wall?! I love it.
I started this card off by working on the butterfly. After a bit of trial and error, I decided to stamp and heat emboss the wings on cardstock that was already die cut. I had struggled with die cutting an embossed upper wing (the wings really stretch out), so if you want to stamp first before die cutting, I suggest lining the upper wing stamp up in your MISTI using the stamp packaging as an alignment guide. That way, once you heat emboss, the wings should be aligned a bit better for die cutting. Luckily, the lower wings don’t have this problem since they’re a bit more fixed than the upper wings. Once I had the wings lined up, I heat embossed them with Rose Gold embossing powder from Brutus Monroe on Ballet Slipper cardstock. I love this combination, it makes such a soft, beautiful butterfly! With I had the wings done, I decided to black heat emboss the body on the same Ballet Slipper cardstock. I could have just cut the body out of any cardstock, but I really wanted to have the same heat embossed texture and shine.

Now that the butterfly was assembled, I moved on to the card front. I used the three outer floral stencils from the stencil pack and stenciled them on C9 white cardstock. I used Sprout for all the greenery, Sorbet and Ballet Slipper for the spikey flowers, and Stardust for the buds and small icons. The stenciling turned out perfectly and matched the butterfly really well!
Alcohol Ink Butterfly
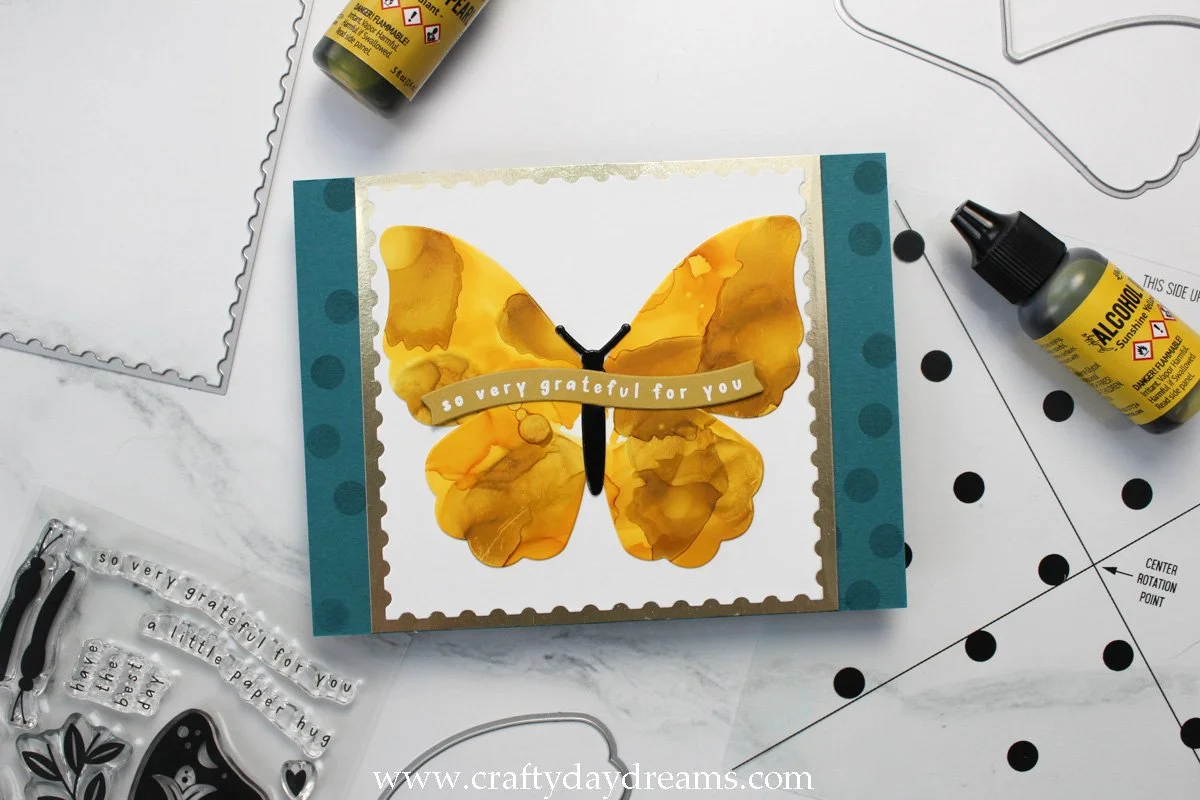
For my birthday, my husband ended up picking me up some alcohol inks and I couldn’t wait to try them out! This was my first time ever using them, and while playing around with them, I had the idea to die cut the butterfly out of one of the panels I made. I thought the alcohol ink background would make a stunning butterfly, and I really love how it turned out! (if you want the alcohol ink colors, comment below and I can share them!). Since the wings are glossy thanks to the yupo paper, I decided to die cut the body out of Simon Says Stamp glossy black cardstock. I think this fits the butterfly perfectly.
After a bit of playing around, I decided I wanted the butterfly to eventually be matted on a Peacock background since I really liked the contrast it brings. After trying out different cover plates, edge dies and arrangements, I settled on using the square postage stamp-esque die from the Petal Pushers die set to glue the butterfly on. I decided to make this card landscape, and since I wanted the butterfly section to cover the full 4.25 inches, I matted the postage stamp square on a 4.25 x 4.25-inch square piece of Simon Says Stamp matte gold cardstock. The gold cardstock pulled some of the gold shimmer out of the butterfly and really complements the Peacock cardstock.
Now for the Peacock background panel. I decided to stamp three turns of the Scattered Dots Turnabout stamp in Peacock ink to give a subtle pattern. I love the playfulness the dots add to this card! To finish it off, I white heat embossed the ‘so very grateful for you’ sentiment from the stamp set on Stardust cardstock and die cut it using the coordinating die.
Stitched Butterfly Thank You Card
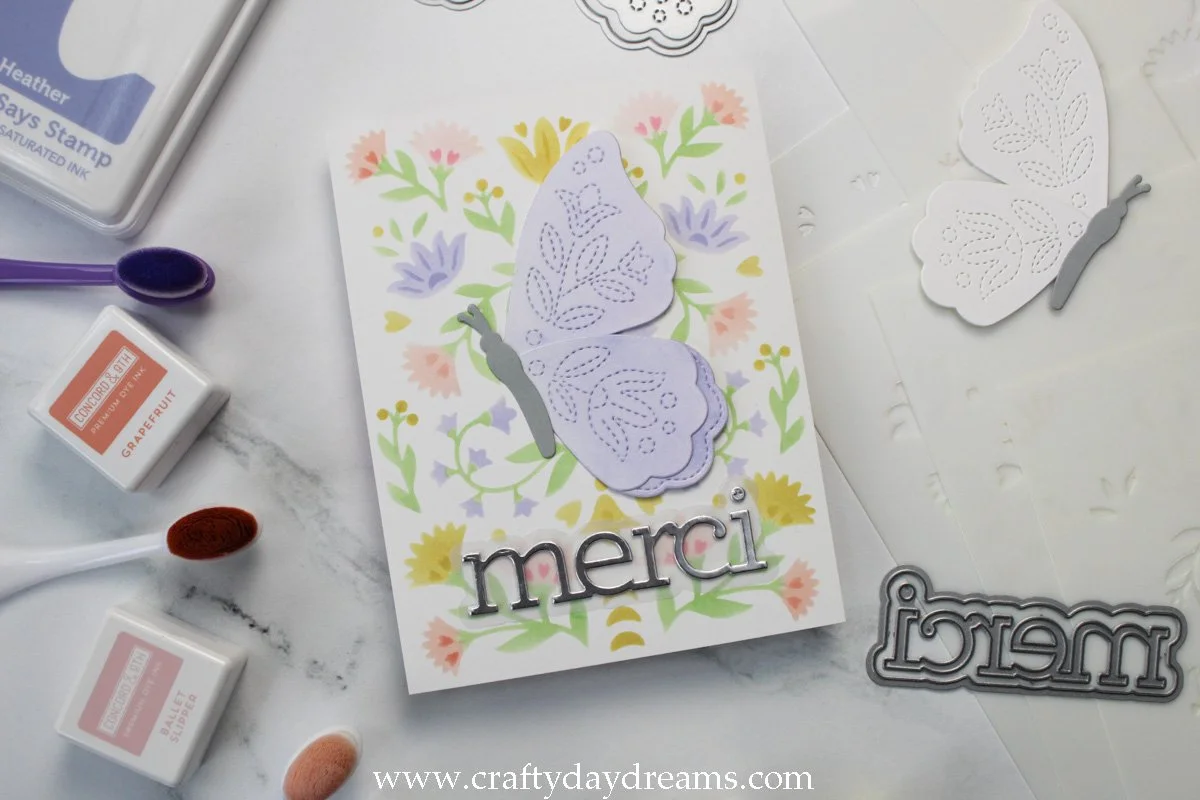
For this last card, I really wanted to incorporate the rest of the bundle I hadn’t used yet. In this case, that was using all of the stencils and the stitched butterfly die. I started off by stenciling the outer floral stencils first using Parsley, Ballet Slipper, Grapefruit and Stardust. For the outer floral details stencil, I used Sorbet ink on the Grapefruit florals and Honeysuckle on the Ballet Slipper florals. For the inner floral stencils, I used Parsley ink again for the greenery, Grapefruit for the two spikey flowers, and the large florals in Heather from the SSS Pawsitively Saturated ink line. I was a bit stressed (really just overthinking) over these color combinations, but I feel like the panel turned out really good!
When I started working on this card, I knew I wanted to use the Merci die from Simon Says Stamp and CZ Design since I would be sending this card off to my husband’s family in France. In my head I was picturing a butterfly as the focal point, and the greeting as a secondary focal point. To make this happen, I decided to make a stitched side-view butterfly (and I love that C9 included dies to make side-view butterfly bodies!). I lined up the wing and inner stitching dies and die cut them out of C9 white cardstock since I wanted to blend on some color to make the butterfly really soft. I lightly blended on more Heather ink to the wings but blended it with a heavier hand on the lower wing detail piece. I glued the wings together, then snipped the butterfly in half, then glued on a body I die cut out of Dove cardstock.
Lastly, I got to work on the sentiment. I die cut the shadow layer to the Merci die out of SSS heavyweight vellum. I die cut the word die out of C9 matte silver cardstock and two layers of plain white cardstock for dimension. I assembled the greeting and glued it on the bottom third of the card front. From here I placed the butterfly and glued it down while leaving the tips of the wings without glue to give them a bit of movement.
So what do you think of these three cards?! I had a lot of fun creating them and I like that they all have a little bit of a different feeling to them. One little tip I do have for you is to get some small/detail blending brushes for this stencil set if you don’t like masking off areas with post-it tape! It really is a fabulous bundle that you can you for many occasions! As always, thank you for stopping by the blog today, and I hope to catch you next time with more inspiration! 😊