

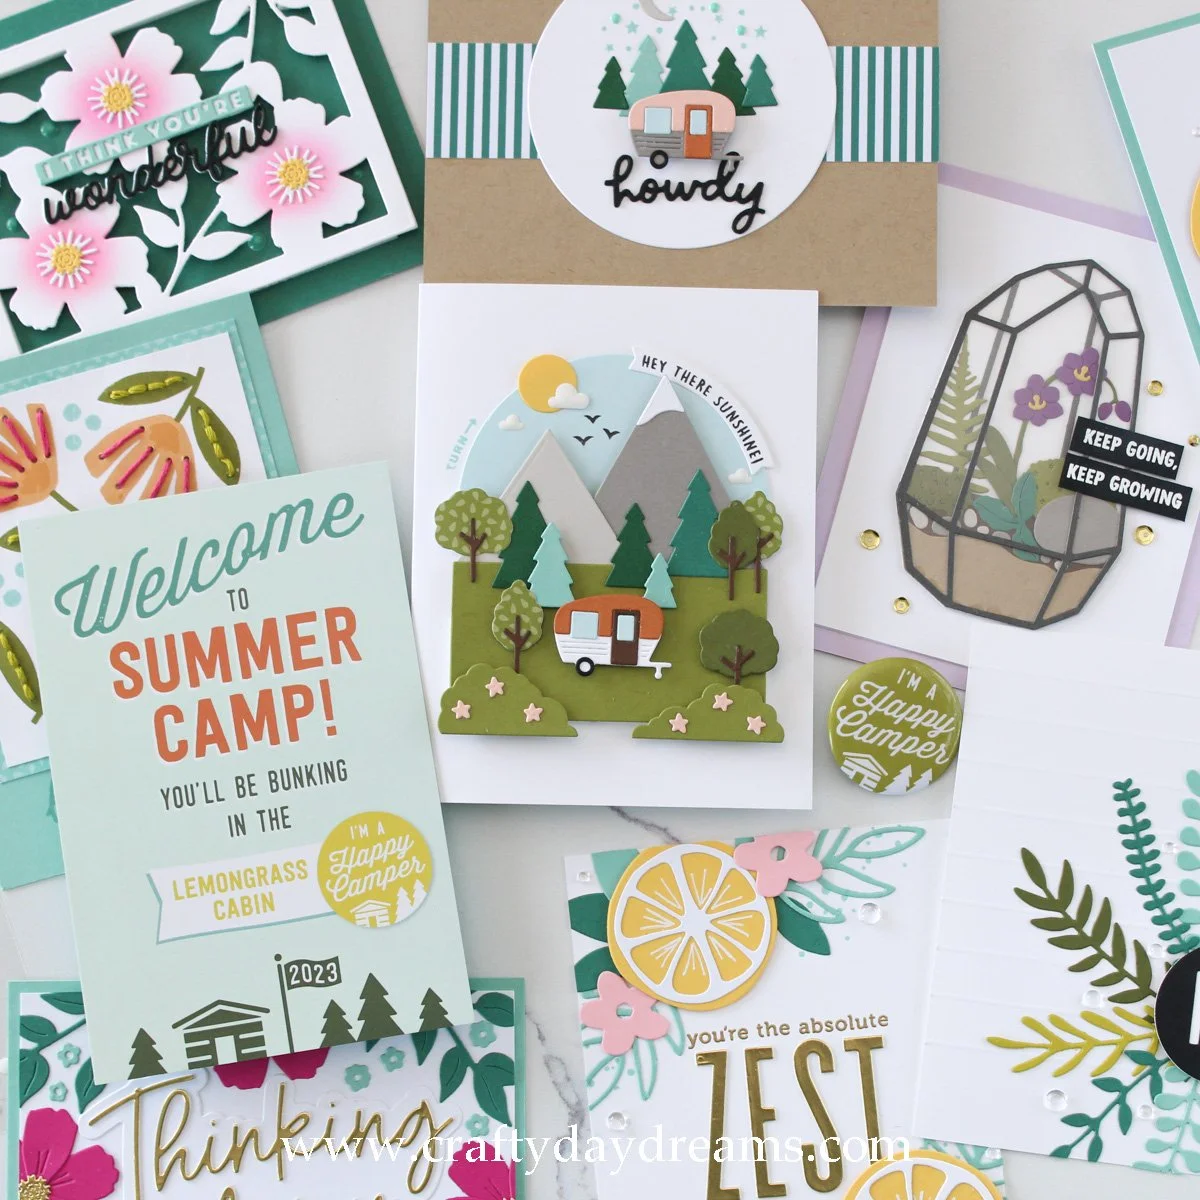
Concord & 9th— C9 Summer Camp 2023
Hello, Friends!
Today I’m finally sharing the things I made during and after C9 Summer Camp 2023 and giving a little run down of the event! This year was my second year as a camper, and I’m so glad I could attend again! This event was, and always is, a blast!
If you’re not familiar with C9 Summer Camp, it’s an all inclusive virtual event that Concord & 9th puts on each summer. This event comes with a box of packed full of products (camp kits), paper, embellishments, goodies, and more! The C9 team really packs these boxes to the brim! Each year campers are divided into cabins (these are randomly assigned) and each cabin has a cabin counselor that is an instructor during the event. This year the instructors were Kristina Werner, Seeka, Laura Bassen, Jeff Lindberg, Dilay Nacar, and Jennifer McGuire. The way this event plays out is that it kicks off on a Friday night with a campfire with Greg and the counselors (this year they were all together in-person!). The campfires are always SO fun! Greg and his team plan so many fun things each night, often lots of hilarious hijinks haha! On Saturday and Sunday the instructors will teach their classes with plenty of breaks in between classes. There’s even a mystery cabin die that each counselor has that they created with the C9 designers! Such a fun touch, and you can pick up the rest of the cabin dies and other products through the Trading Post during the event and shortly after. This event is truly wonderfully planned and, in my opinion, so so worth it.
This years classes were Inked Blossoms, Squeeze the Day (4 citrus themed notecards), Cardscapes (including an interactive card), Summer Sprigs (the Turnabout class), Tiny Terrarium, and Hugs & Stitches. You can craft along and follow the directions in the Field Guide to a ‘T’, or you can add some of your personal touches and make these cards however your heart desires! So enough with the oozing over the event, and onto some photos and details on cards I made!
Inked Blossoms
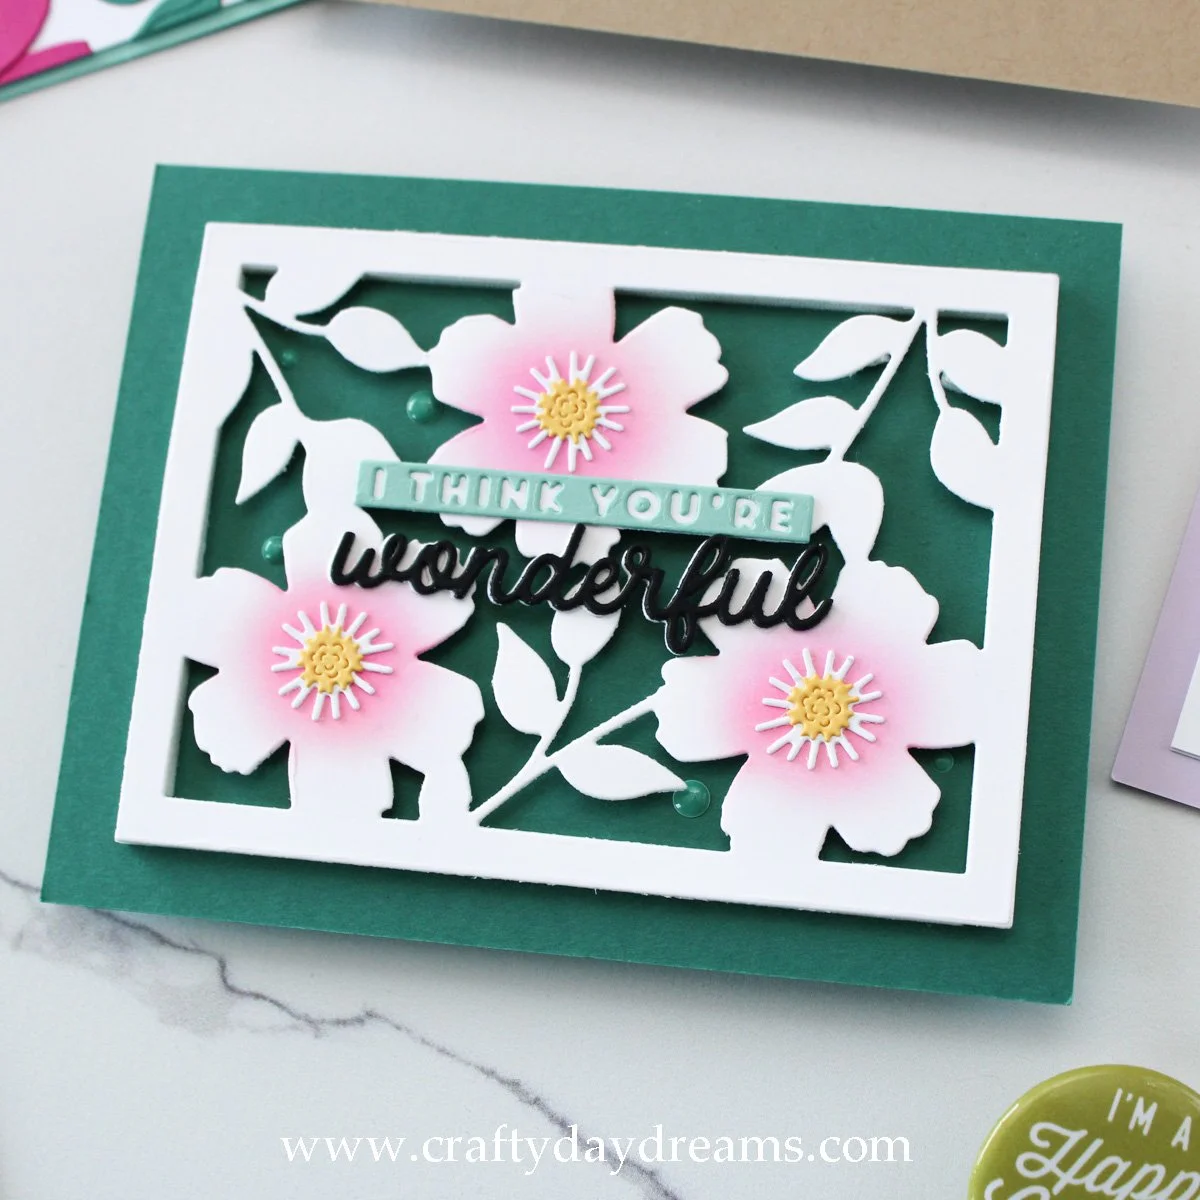
For this first card, I followed the class instructions. I love this one! The dark Juniper background and those beautiful blended florals are such a gorgeous combo!

On this card, I took a little bit of artistic freedom. I noticed the greenery in the floral coverplate was very similar to the large greenery die in the In the Meadow die set, so I wanted to play around with that. I ended up deciding to use the ‘Thinking of You’ die from that same die set as my focal sentiment, then built a floral packed scene around it. The large flowers were die cut out of Dragonfruit with matte gold centers, the mini flowers from the Summer Sprigs die set were die cut out of Tidepool, and the leaves were die cut out of Juniper cardstock. I do like how this card turned out, but now I wish I cut the shadow to the sentiment die out of my panel then inlaid the ‘thinking of you’.
Squeeze the Day
Seeka’s class taught four different variations of citrus themed notecards, but since I don’t make/send notecards, I decided to make larger sizes.
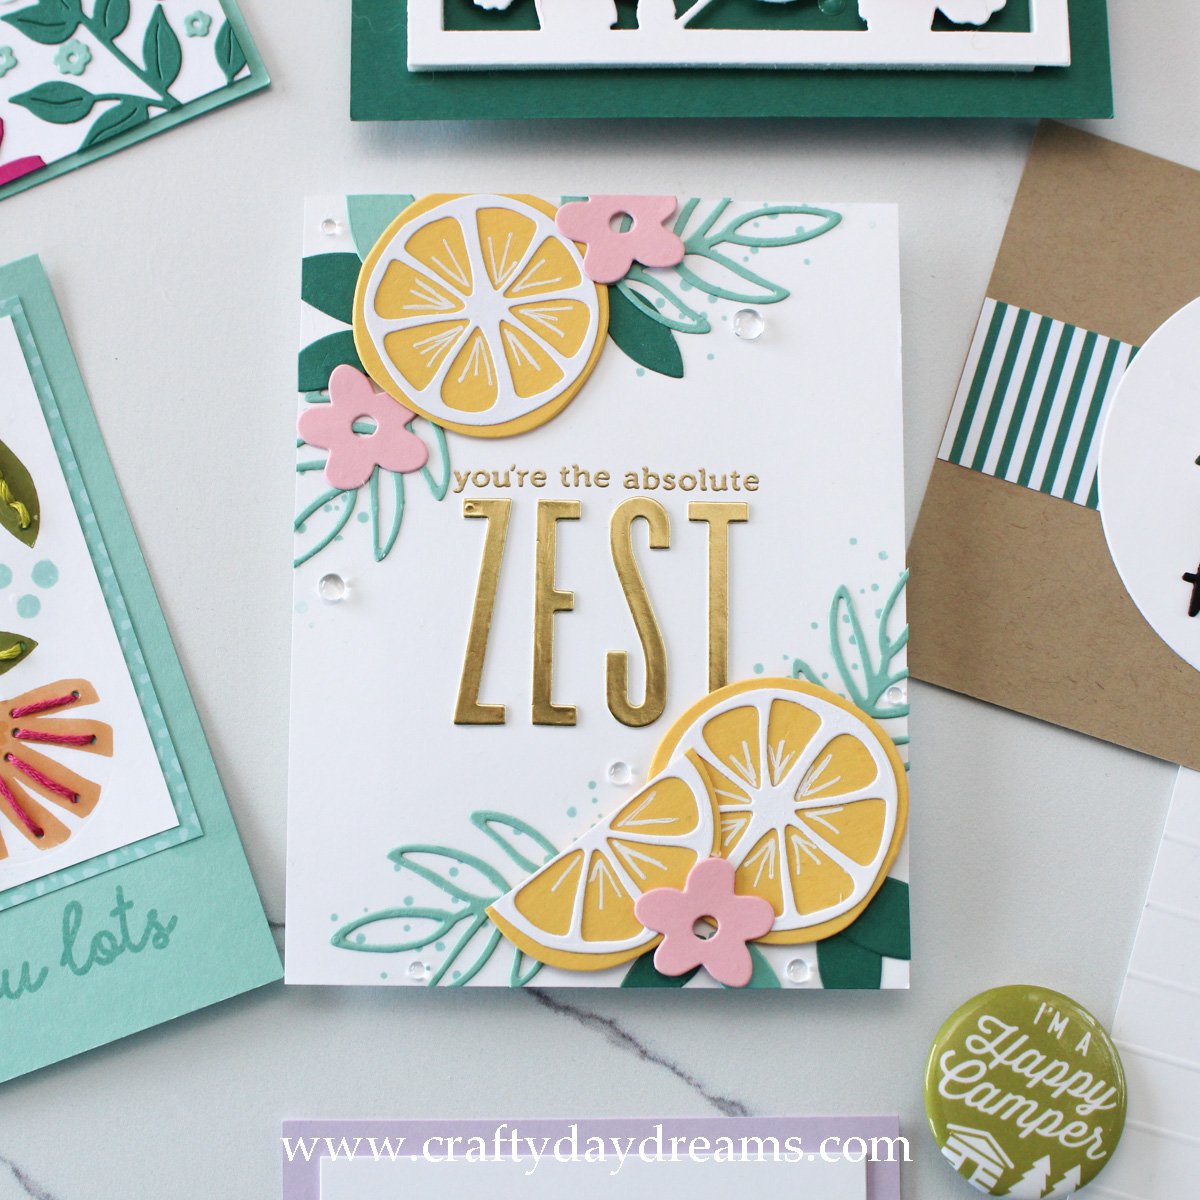
This card turned out a bit different from how I originally planned it. I was inspired by this image and wanted to replicate it, but I couldn’t get things arranged in a way I liked on my card front. So I pivoted, and ended up with this card. I really wanted to play with a lemon pun, so I die cut ‘zest’ using the All the Letters die set, which I absolutely love!!! This was an inventory sale purchase, and I’m soo happy with it. For the ‘you’re the absolute’ I pulled out the Happy Thanks stamp set and stamped most of the ‘you’re the absolute best’ sentiment in the middle of the card front, then gold heat embossed it. To build the rest of the card, I die cut stems and leaves out of Tidepool and Juniper cardstocks, the flowers out of Pink Lemonade, and the lemons out of Buttercup cardstock.
I decided to get a little crazy (crazy for myself—I have not mastered the art of white gel pen details 😆) and draw some lines using white gel pen to make the lemon look a little realistic. I created three full lemons and decided to cut one of them in half to get a slice. Before gluing down my die cuts, I stamped the splatter stamp in Tidepool ink to fill in some of the area. With the help of some Press’n’Seal, I got my elements glued down as well as popped up on some foam squares. To finish the card off, I added some dew drops.

I had some leftover lemons, so I decided to make a mini slimline to use them up! I pulled a little bit of inspo from the second card in the class and cut a strip of patterned paper 0.75-inch thick and glued it to the bottom of my white cardstock cut to 3 x 6-inches. I lightly ink blended some Buttercup ink on the full lemon and stamped the splatter detail stamp in Buttercup ink in this area as well. I love this detail, it really makes the lemon look more realistic! I added a stem by die cutting the symmetrical leaf die out of Nutmeg and glued it to the back of the lemon. I also added some leaves in Juniper and Tidepool and a flower out of Pink Lemonade cardstock. Once I had my elements ready, I popped the full lemon up on thin foam squares and the lemon slice on thick foam squares. I glued the leaves down and popped the flower up on thin foam squares above it. I stamped the ‘Squeeze the Day!’ sentiment in C9 black ink, then glued down three clear sequins I spread around the lemon arrangement. So cute!
Cardscapes
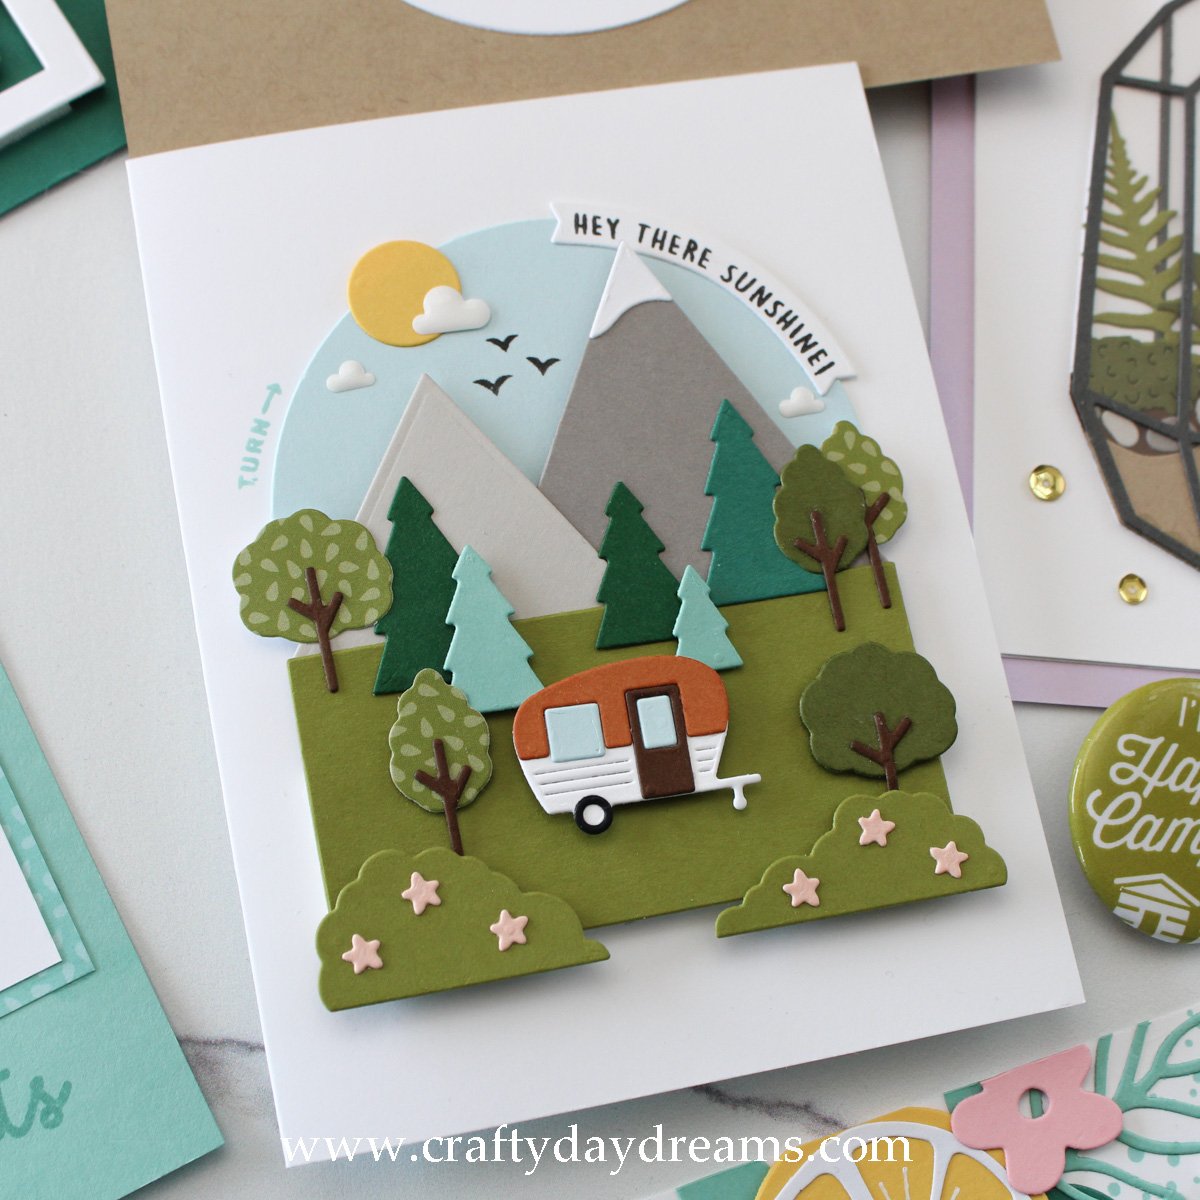
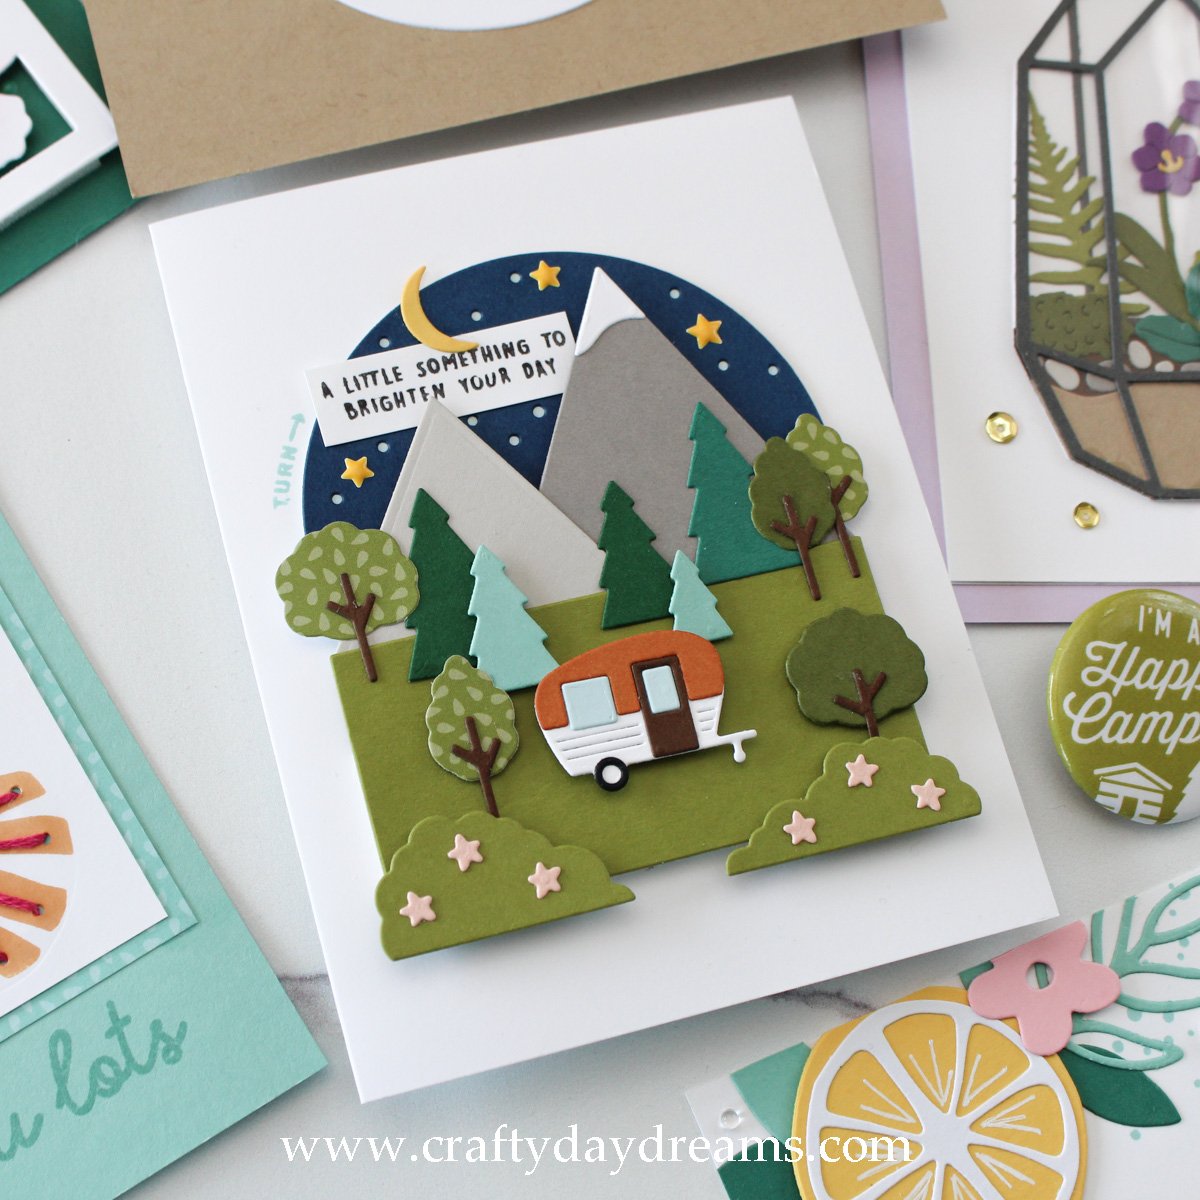
How cute is this card?!?! I absolutely love it. It’s the interactive card of the event, and it’s to die for! This card is made interactive with the use of a brad and two decorated semi circles (even with shaped enamel dots!). Now that I have one made, I could make dozens of these!

Once again, I followed the class instructions on this card because it is also super cute! I love the ‘belly band’ stripe in the background and the cute little scene on the circle. So sweet!
Summer Sprigs
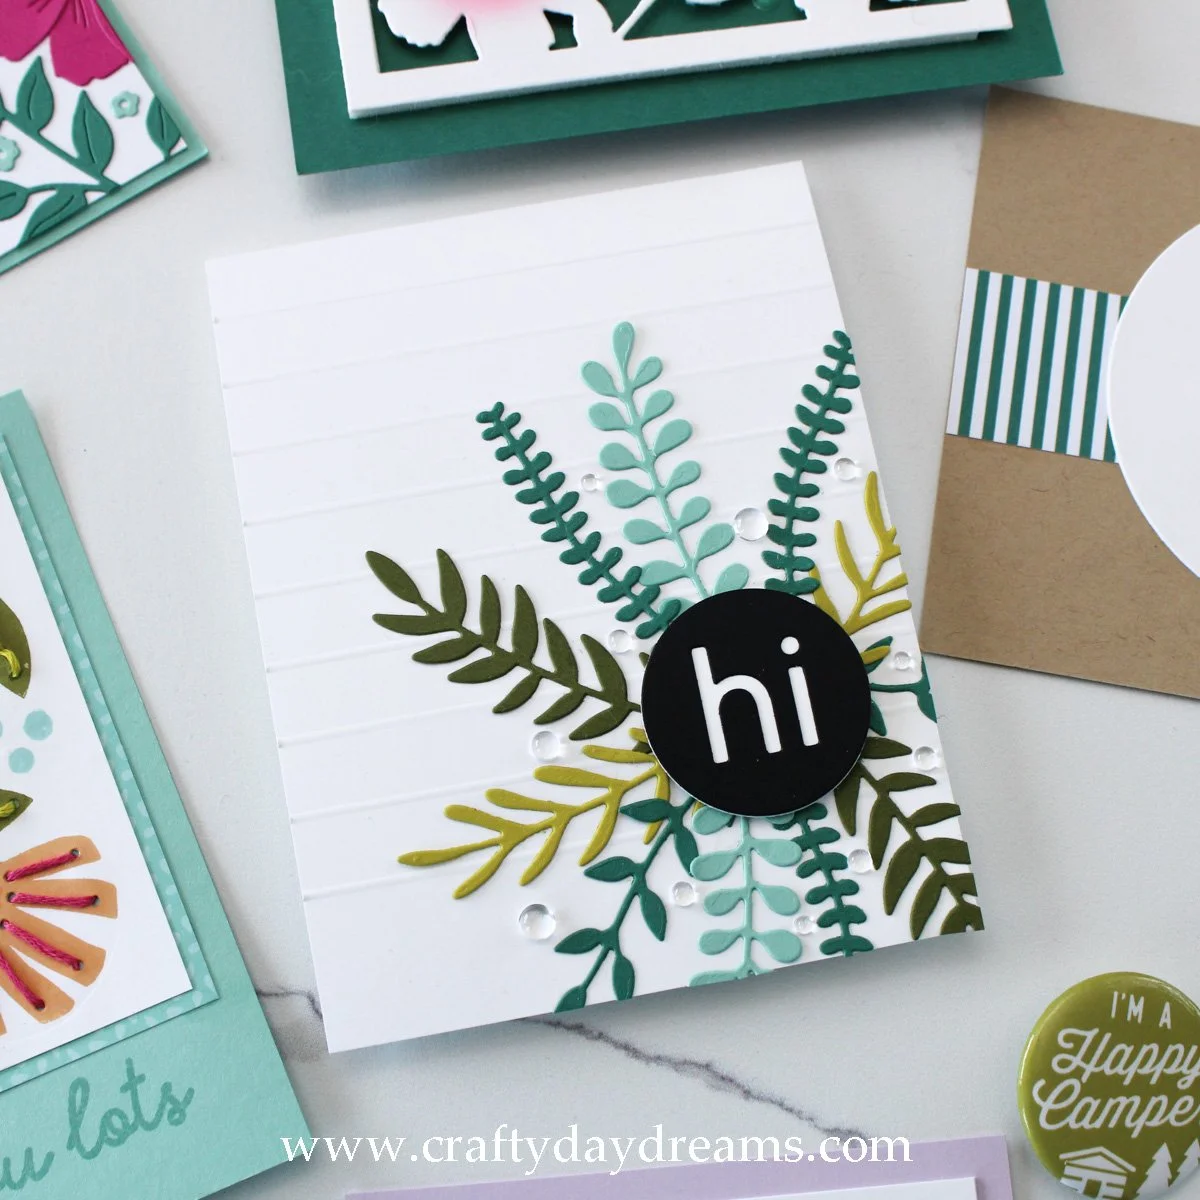
I decided to only make one card using the products from this class, and it’s not either of the projects that were taught. The Turnabout included in this class is really cute, but I wasn’t in the mood to line it up and use it the day I was working with these products (which is silly because they’re super easy to use!). A week or so before the event, I had the idea to use the leafy die cuts and pair it with the super cute ‘hi’ die that was also in the die set. I wanted to channel my inner Laurafadora (had originally thought of making it in rainbow order) or rachelrdesigns (like with this pin). This idea is pretty similar to one that C9 had in their coloring pages they included on the class website too!
I die cut sprigs out of the same colors as was used in the Turnabout class— Tidepool, Juniper, Lemongrass, and Artichoke. I die cut the ‘hi’ out of black cardstock and a white backer using a nesting circle die in my stash. Before gluing things down, I decided to add some texture to the background by scoring at every 1/2-inch all the way down the cardstock until I got to the last inch, which I decided to leave unscored. With my sprigs glued down, I popped the ‘hi’ up on thick foam squares, then finished the card off by adding lots of dew drops!
Tiny Terrarium

I’m actually surprised by how much I loved playing with this die set! Before the event, I didn’t feel super into it, but once I watched the class, I knew I should give it a try! I decided to tweak the design a little bit to my interests (though the mushroom version from class was super cute), and die cut the orchid out of Fig cardstock, the fern and big bush out of Avocado, orchid stem and small bush out of Artichoke, a plant out of Juniper, and stones out of Pebble and Cobblestone. I had so much fun putting this together, it’s such a cute die set! I decided to back the terrarium on some white cardstock and mat it on Lilac cardstock to tie into the Fig of the orchid.
Hugs & Stitches

This was another class that I wasn’t too into when I received my class kits. I really liked the stamp set, but had never stitched on cards before and hadn’t really cared to. Well, that changed thanks to Jennifer McGuire haha! She was the instructor for this class, and what a perfect fit she was for it since she is the Stitching Queen! I had been working on some cross stitch lately, so I decided to give stitching on cards a go, and I’m so happy I did. It adds a wonderful detail and super easy and therapeutic. If you’re on the fence, I suggest you give it a try! I followed the class instructions almost completely, but decided to stamp the ‘love you lots’ sentiment in Tidepool ink on Tidepool cardstock. I love this card and I plan to send it to my mom because I do, in fact, love her lots.
That wraps up this event! If you also attended, I hope you had as much of a blast as I did, and if you didn’t, I hope this makes you consider attending next year! Now you might be thinking “is there any way that I can get those products?”. The answer to that is possibly! Concord & 9th only ‘sells’ these products in the event they were created for so you can’t get them from them, but recently a Buy/Sell/Trade page was created for Concord & 9th products on Facebook, so you might be able to pick some stuff up there. If you search ‘Concord & 9th Buy Sell Trade’ on Facebook you should be able to find it! Thanks so much for stopping by the blog today, I’ll catch you next time! 😊
Affiliate disclaimer: all links to Waffle Flower, Altenew, Scrapbook.com, and Spellbinders products are affiliate links. These links allow me to get a commission at no extra cost to you if you use them to shop! All other links provided are links to supplies and shops I am not affiliated with and I do not get a commission from.
