Sizzix x Catherine Pooler Designs—Jungle-Themed Cards + the NEW Stamp & Spin!!
Hello, Friends!!
I’m so happy to be sharing some cards with you today! I had a lot of fun making these and playing with some new tools from Sizzix! I was sent these products to play with, but as always, my opinion is mine and I wasn’t told that I had to rave about products.
The Stamp & Stencil
So, with that in mind, we’re going to talk about the tools first! Last year (or at least I believe it was last year, it could be longer), Sizzix released the Stamp & Stencil tool. If you haven’t heard of this, it’s a giant stamp platform (the tool measures ~10 x 14-inches) that has a removable hinged lid that you pick up your cling stamps with. To keep your cardstock in place, there is a low-tack sticky grid sheet that is used on the base of the platform, but one unique thing about this is that it’s a consumable, so you’ll have to buy replacements (the cost for a pack of five is ~$12.99, so not too bad!), but it’s not a product you have to replace every five uses or something like that.
Now onto the second part of this tool—stenciling! You get a blue stencil adapter that allows you to stencil at different heights on your cardstock, and Sizzix stencils pop onto with two little pegs on this adapter which holds your stencil in place. That does kind of lock the usefulness of it to Sizzix stencils since other companies don’t have holes in theirs to line up with the tool, but it’s still a really great option to have! You could likely also tape your stencils to your cardstock that’s being held in place on the platform, so things are still usable! I do think the Stamp & Stencil tool would be a great product for crafters new and old, the value of it for the size is amazing when you compare it to a MISTI that retails for $10 more with a smaller surface area.
Now, my only ‘issue’ is with the sticky grid sheet, and this is more me being particular! When you peel your project up, you tend to get some low-tack sticky residue on the back of your cardstock. For some reason this kinda drives me nuts, but it’s the same thing that can happen when you use ‘new’ pieces of low-tack tape to die cut, and this can be simply removed by rubbing your fingers over the area of using an adhesive eraser tool. Besides that, my one little gripe is that when you are done using the tool, you pop the release paper back onto the grid sheet to cover it up so dust and pet hair/embossing powder/paper hairs, whatever that could possibly stick to it doesn’t. However, it doesn’t really stick to the whole sheet and will tend to peel up around the edges. This is more pesky to me since I have a husky and his hair gets everywhere, so I have to be very careful with this. Going hand in hand with this, when you peel your cardstock off this sheet, it can also peel up the back side of the sticky grid from the tool base. It’s like this for a reason since it’s to be replaced and all that, and nothing would be worse than fighting to get this sheet off when you have to replace it, but honestly, those tiny little problems are my only ‘issues’ with this tool. I do think this tool is fabulous—you have an unlimited area to stamp on since the platform is so huge and open that you could stamp on 12 x 12 paper with ease, I like that stenciling is made easy with it, and not to mention, it has a fabulous addition with the Stamp & Spin.
The Stamp & Spin
When I tell you the Stamp & Spin has stolen my heart, I mean it. This tool, wow!!!! Talk about amazing. The Stamp & Spin allows you to create wreaths and patterns with any stamp in your collection without any thinking. Now, you might be thinking, “Amanda, I have a Stampwheel, why would I want or need this? This is nothing new.”, to which I would say oh ho ho, you are so wrong haha! I, too, have a Stampwheel, yet I have not managed to create a wreath with it yet 🫣. To me, the Stampwheel is not a very intuitive product in the same way that the Stamp & Spin is. I have managed to make wreaths and patterns with the only thoughts in my brain being what stamp I want to use and not ‘how do I do this, this isn’t working’. It’s literally brainless, easy creating!
This addition works by popping it into the hinge groove on the Stamp & Stencil tool and which places the circular portion of the tool in about the middle of the sticky grid sheet. To make things easier on myself, I’ve just been stamping on a full sheet of cardstock so that I can trim it down however I please once I’m done stamping. All you have to do is pick any stamp you’d like, pop it wherever you’d like it on the tool, then simply stamp, move it one click and repeat the process 8 times for a wreath, or move it two clicks and repeat the process 4 times to create a pattern. You can get strategic about where you place your stamps and how tight you want your wreath/pattern by putting your smaller stamps on the smaller ring on the spin platform.
If any of my chatter about both of these tools has been confusing or if you want to see things, Sizzix does have some fabulous videos on their YouTube channel! Now onto the cards!
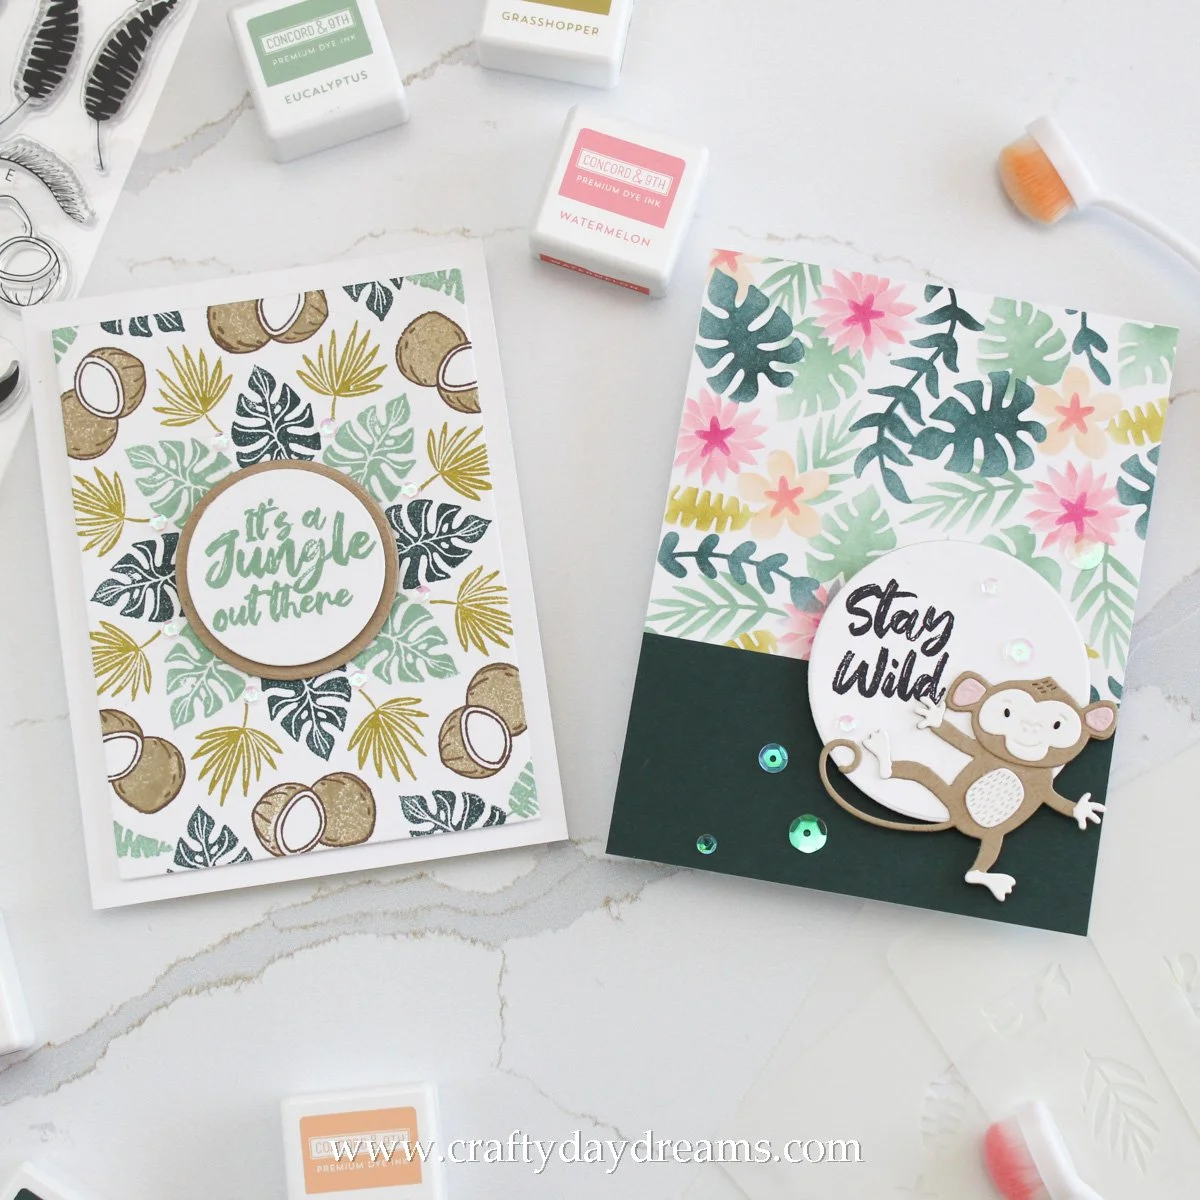
A little bit of monkey business!
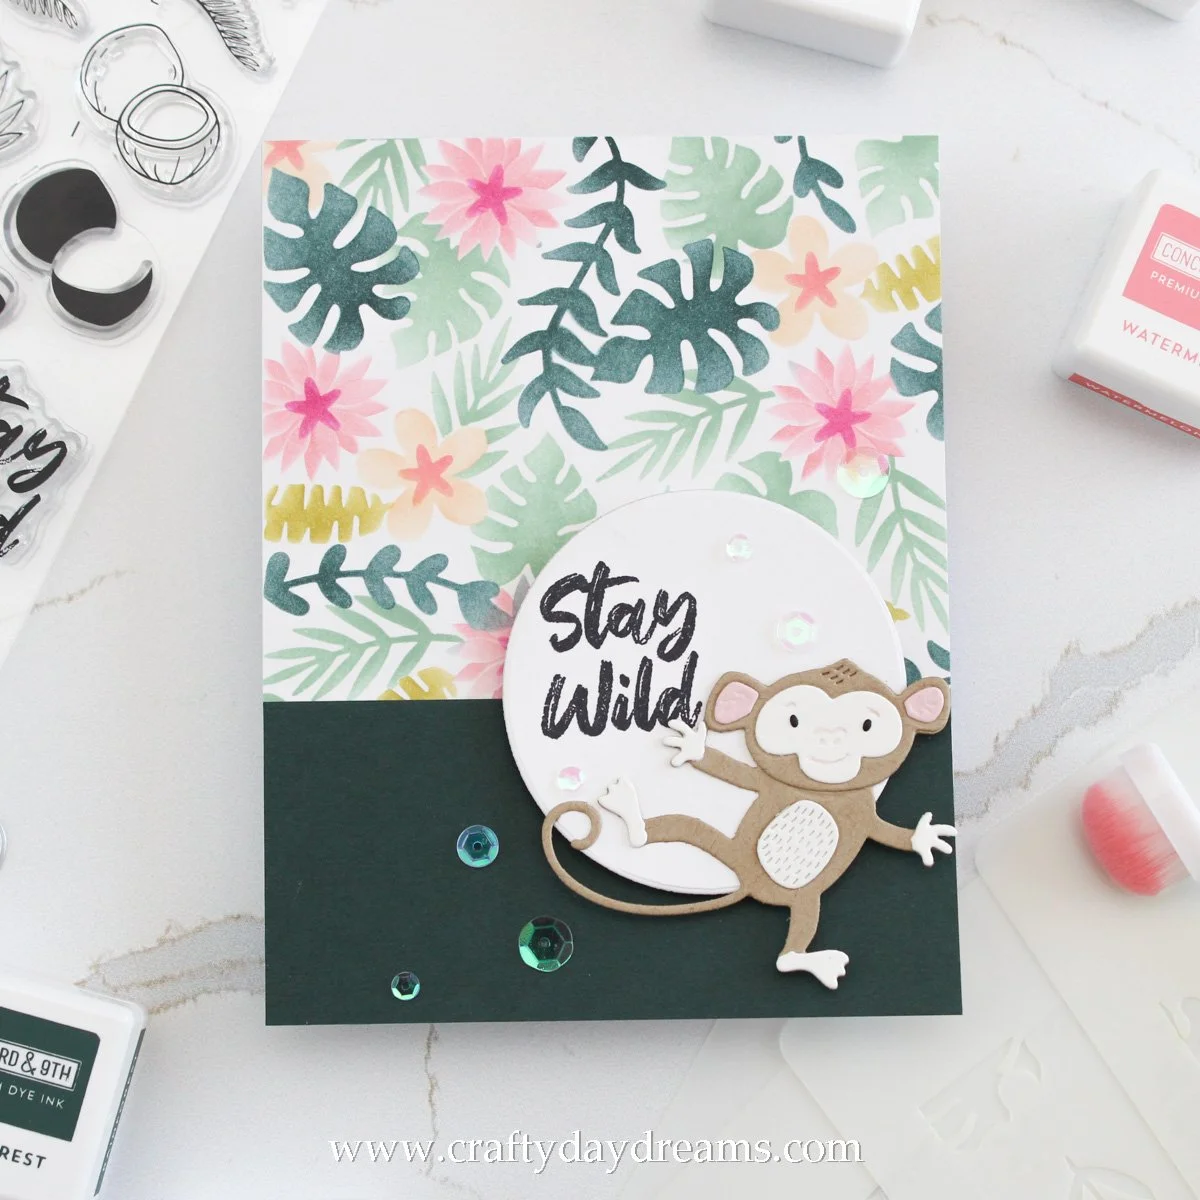
I can’t get over how dang cute this card turned out!! I really wanted to pair the It’s a Jungle Out There stencil with the cute little monkey from the Going Bananas #2 Thinlits die set, so I did just that! I used my Stamp & Stencil tool to do all my stenciling today, and I really enjoyed using it. I’ve really been into the new colors Concord & 9th released this year as a whole color palette, and to make this card easier on myself, I decided just to use them. For the first stencil, I decided to blend on Eucalyptus ink for all the foliage. You could definitely blend leaves all different colors, but I was mainly sticking with two! On the second stencil, I ink blended Watermelon ink on to the spiky flowers and Creamsicle ink on the rounded flowers. These colors really are perfect for tropical flowers!
On the third stencil, I added a second layer of Watermelon ink to the spiky flowers, then did my best to blend Rainforest ink onto the foliage without overlapping the flowers. I didn’t get this fully perfect, but things look good enough for me! For the last stencil, I blended Grasshopper ink on the frond-like foliage, then added flower centers to all the flowers with Wildberry ink. I love how this panel turned out!
I used my A2 Layers dies from Waffle Flower to cut out an A2-sized rectangle, then decided I needed to do a little bit of color blocking so that when I added the monkey it would stand out. To stay with the color palette and bring a smidge of drama, I decided to cut a strip of Rainforest cardstock to roughly 2 x 4.25-inches and glued it on the bottom of my panel.

At this point I decided it was time to die cut the monkey, so I pulled out some Wheat cardstock for its body, Ivory cardstock for its face, belly, and hands and feet. I die cut the eyes out of black cardstock, and the pink inner ear pieces out of Ballet Slipper. Once I had everything glued together, I realized I lost a little bit of the details in the monkey’s face, so I pulled out a brown colored pencil and very lightly traced over the depressed areas for his eyebrows, nose, and mouth.
I needed a greeting to tie this whole card together, so I pulled out the Stay Wild stamp set and chose the greeting ‘stay wild’. Since there aren’t coordinating dies for the sentiments, I decided to stamp it on a 2.5-inch circle (from a Simon Says Stamp Nesting Circle die set) in Jet Black ink from Altenew. I popped the circle up on some thick foam squares from Scrapbook.com, then glued the monkey onto the circle. To finish the card off, I decided some sparkle was needed, so I used Swan Lake sequins from Buttons Galore & More as well as two large sequins from an old Darice sequin set. So cute, right?!
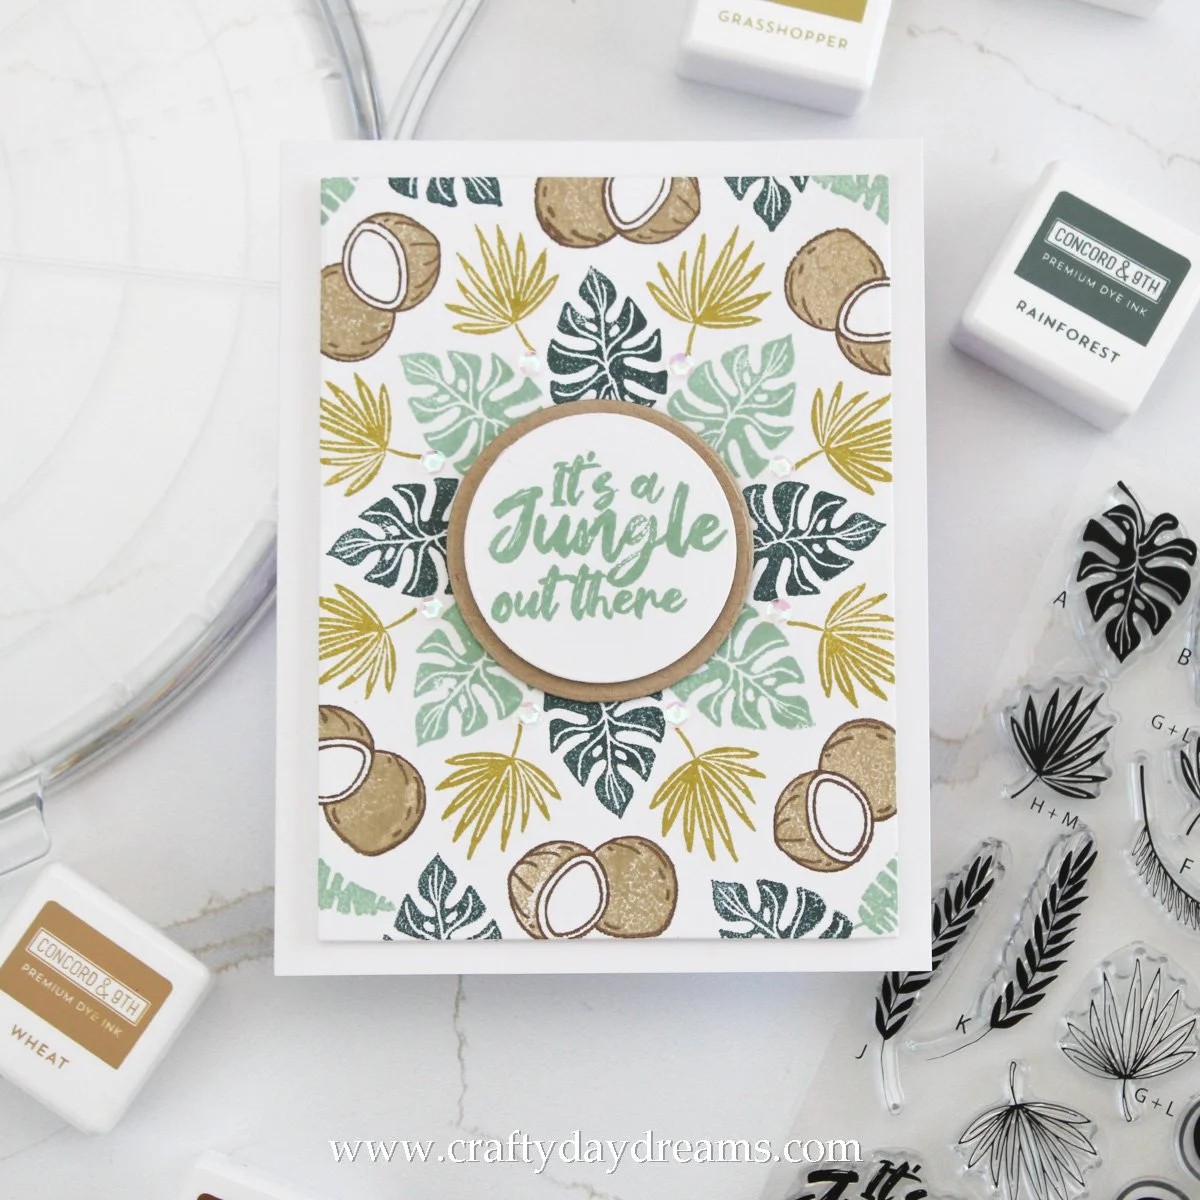
Wreath or pattern? Jungle fun!
For this card, I pulled the Stamp & Spin and the Stay Wild stamp set out and went to town! I decided to stick with the colors I used for my greenery on my last card (Grasshopper, Eucalyptus, and Rainforest) to keep these consistent and kinda make a little set of cards.
Since the monstera leaf stamp is on the small side, I decided to start my wreath/pattern close to the center of the of Stamp & Spin by the blue circle. For some reason I really wanted the monstera leaves to alternate in color, so I stamped with Eucalyptus, moved the tool two clicks and stamped another Eucalyptus leaf down until I had four, then did the same with Rainforest after I moved the position of the leaf by one click before I started stamping. Once I had those four leaves stamped, I decided to add a palm leaf, so I nestled it into the open space between the monstera leaves and stamped it 8 times in Grasshopper ink, only moving one click each time.
Next I decided coconuts were needed, so I stamped the coconut outline in Nutmeg ink. Once those were done, I lined up the coloring stamp for the coconut and stamped it in Wheat ink. It was such a breeze doing this! I wanted the outer edges to be filled in a little bit, so I pulled out one of the fronds and stamped it in Eucalyptus ink. I didn’t quite get things how I wanted them to be and still had more white space to fill, so I added a monstera leaf stamped in Rainforest ink.
At this point, I felt my panel was done, so I die cut it using my A2 Layers dies which cut it to 3.75 x 5-inches. For the sentiment, I stamped ‘it’s a jungle out there’ in Eucalyptus ink to tie it back into the panel. I thought this color would be a little bit more fun than black ink, but either work! I decided to die cut the sentiment into a 1.75-inch circle using a nesting circle die set. To add some contrast from the white circle and the white in the background panel, I decided to mat the sentiment on a Wheat circle that was cut just slightly bigger to 2-inches using dies from a Spellbinders die set since my nesting set didn’t have a die that cut a circle this close.

I popped the white circle up on some 2mm foam squares from Scrapbook.com and stuck it to the Wheat circle, which I then put 1mm foam squares on the back of for a little extra dimension. I added some foam tape to the back of my panel and stuck it on a white card base. For some reason I kinda felt like this card was lacking a little bit, so I decided to pull out the same Swan Lake sequin set and add some small sequins between the monstera leaves. I think this finishes the card off pretty nicely!
Well, that’s all that I’ve got for you today! I really like how these cards turned out, these products are so cute! And I’m so in love with the Stamp & Spin! It truly makes creating wreaths and patterns so easy, and I can’t wait to keep playing with it! Do you plan on picking one up?! Do you have one?! Let me know in the comments down below!
Affiliate disclaimer: all links to Waffle Flower, Concord & 9th, Altenew, Scrapbook.com, and Spellbinders products are affiliate links. These links allow me to get a commission at no extra cost to you if you use them to shop! All other links provided are links to supplies and shops I am not affiliated with and I do not get a commission from.