

Waffle Flower—Postage Collage Christmas Cards
Happy Saturday!
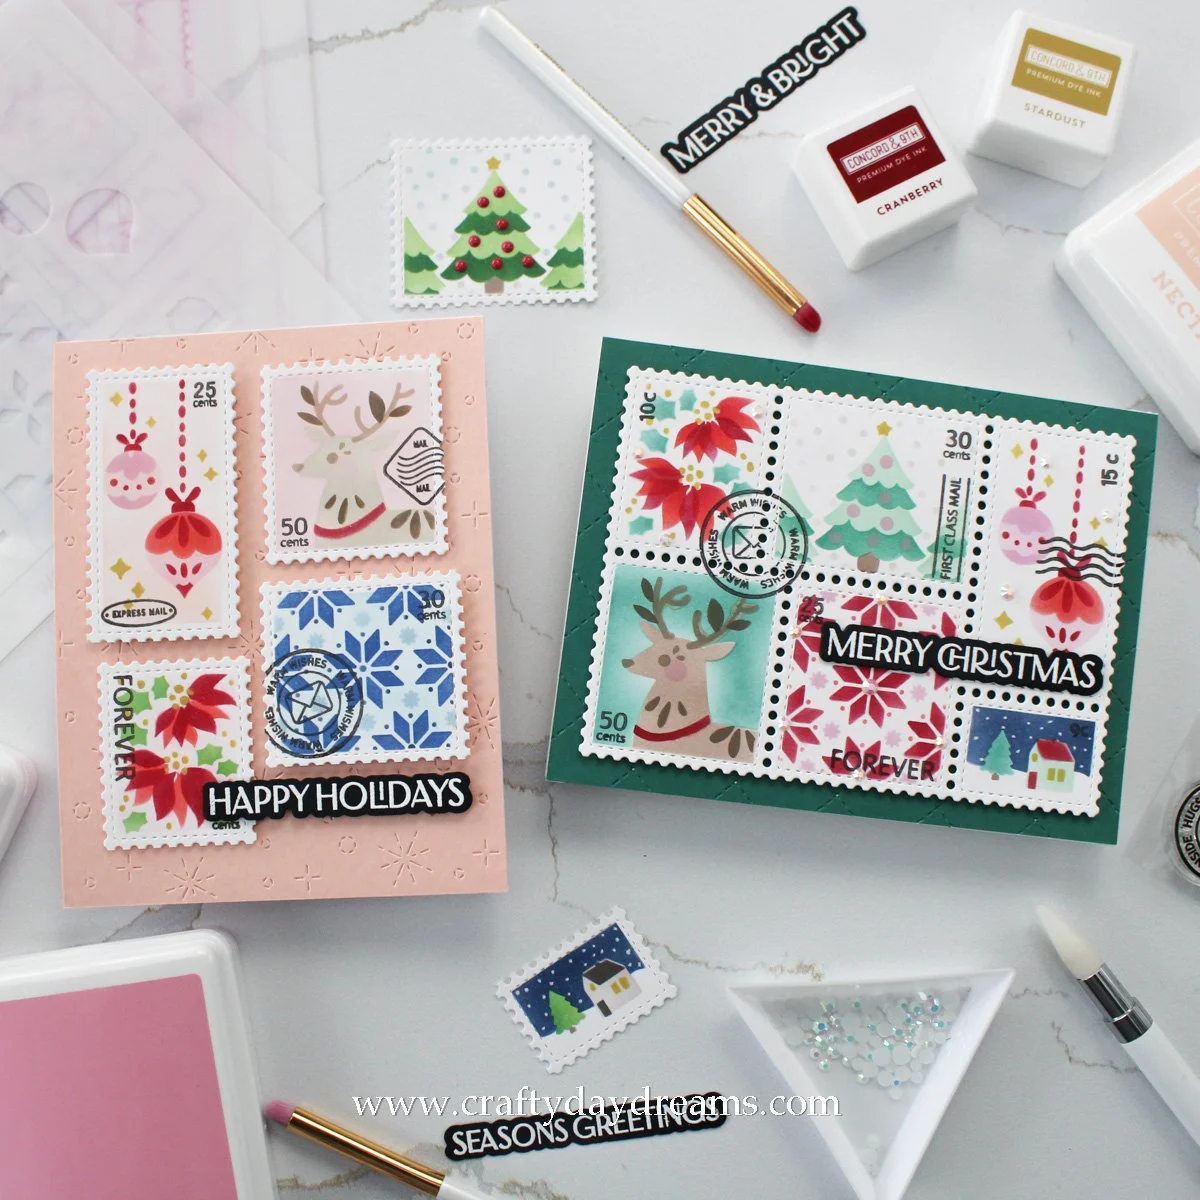
When I tell you I’ve been dying to use this product bundle, I truly mean it!!! I picked up the Postage Collage bundle a couple months back and finally got to using it. It’s a fabulous bundle and I’m so happy to see Waffle Flower coming out with more additions to the collection and allowing us to keep stretching these products. Once I got going on my first card, I just had to make a second that was a little bit different, and I hope you like them both!

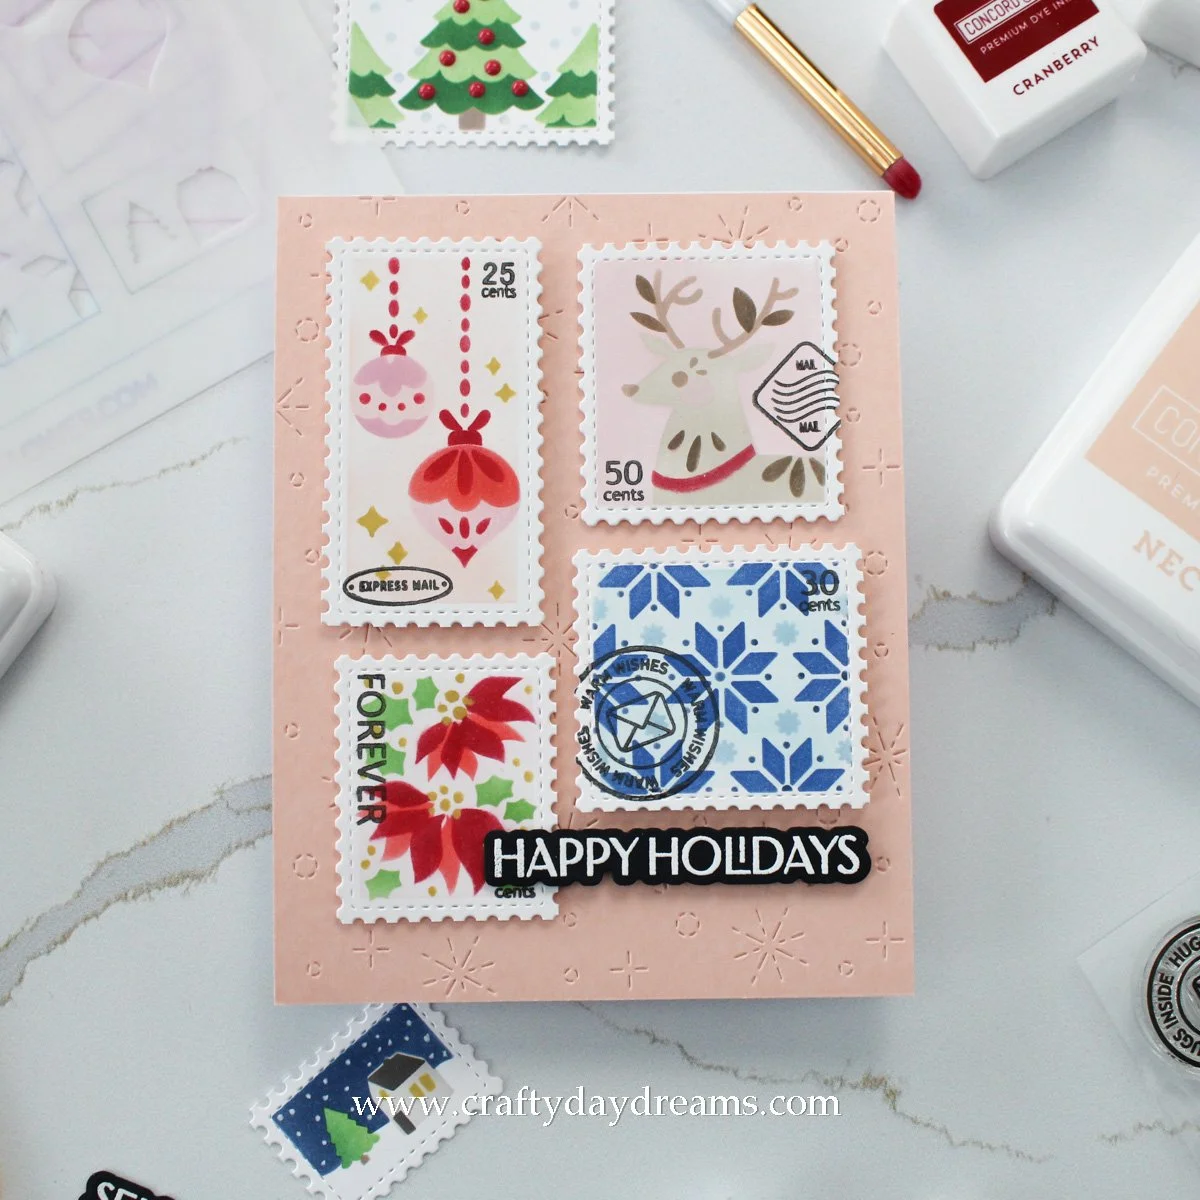
I love the traditional Christmas vibes that this one has! I’m going to be honest though, I was sooo overwhelmed by picking the colors I wanted to use for this, but I went with tried and true colors that bring out the holiday spirit: Sea Glass, Juniper, Cranberry, Poppy, Carnation, and Stardust. When I was working on this panel, my 8.5 x8.5-inch grip mat was incredibly helpful (I love how it holds stencils down) as well as the size 0+ shader brushes that Waffle Flower has recently released. I ended up using small blending brushes where I had to cover more area and the 0+ brushes to get into the smaller areas—it makes a huge difference and allows you to do a little bit less masking off of areas.
I started this card off by die cutting a piece of Concord & 9th white cardstock with the postage die, then popping it on my grip mat. For the poinsettia stamp, I blended on Juniper ink for the holly leaves, Poppy for the larger poinsettia petals, Cranberry for the smaller petals, then Stardust for the flower centers. For the Christmas tree, I blended on Sea Glass for the base layer, then Juniper ink on the second. I added Carnation ornaments, a Stardust star, and Pebble snowflakes. For the ornaments, I blended on a base layer of Carnation ink, then blended on the same ink with a heavier hand to the ornament on the left and blended on Poppy ink to the ornament on the right. I added the star details in Stardust ink, and the ornament details and strings in Cranberry ink.
For the deer, I pulled out some Simon Says Stamp Pawsitively Saturated inks. The base layer of the deer was blended on with Cappuccino ink, the antlers with a heavier hand of Cappuccino (I’m not sure what caused the bleed out around it), and the details on the antlers in Mocha ink. I added the cheek detail in Carnation and the collar in Cranberry ink to pull in some red, then blended Juniper ink on the background while focusing more ink on the outer edges and feathering it out as it got closer to the deer to create a halo effect. For the Nordic snowflake pattern, I used Cranberry ink for the large snowflake parts, then Poppy for the small dots, and Carnation for the small snowflakes. Lastly, for the landscape stamp, I blended on Midnight ink for the background, added a Juniper tree, then created a Sea Glass house with a Cranberry roof and Stardust windows.
I love how all these stamps turned out! They’re so cute!! My main plan when working on this panel was to make it so that the color felt balanced, that there was a hint of each color in each little scene. I think this really ties things together a bit, but it’s really not essential. Craft how you like! I pulled out the Postage Collage stamp set and the Postage Collage for Fall stamp set (I only used this for the ‘warm wishes’ circular stamp and extra prices but know the original stamp set would suffice just fine!) and some black ink and added the price and Forever stamp details.
With my panel done, I decided to pop it on a panel of Juniper cardstock that I used the Quilted card front die from Concord & 9th on. This adds a nice texture to the background which I really like. I glued the Juniper panel on a card base, then popped some 3M foam on the back of my stenciled panel and stuck it down. To add a little something, I added some gems from the Holiday Jewelz mix from Buttons Galore & More. You can totally skip this, but I liked the extra shine it added. For a sentiment, I white heat embossed the ‘Merry Christmas’ greeting from the Elegant Christmas sentiments stamp set on black cardstock and die cut it out. I decided to add a couple more die cuts behind it for a little bit of dimension, then glued it down on the bottom edge of the ornament stamp.
Now this one I had a bit of fun with! I felt like I there was a bit of too much white space in some of the stamps in the first card (there probably isn’t—it’s just a me thing haha) that I wanted to pull in more color with my second go round. I pulled out the Postage Collage Coloring Stencil and got to work coloring in the backgrounds of the poinsettia stamp, the ornament stamp, and the Nordic snowflake stamp. I decided on adding some Nectar ink to both the poinsettia and ornament stamps and Powder ink to the background of the Nordic snowflake. For the ornament stamp, I inked the base layers in Ballet Slipper, then added Carnation for the second layer on the ornament on the left, and Poppy on the ornament on the right. I finished it off with Cranberry details and Stardust stars.
I blended the body of the deer in Latte ink (SSS), the antlers in Cappuccino, and the antler details in Mocha. I added the collar in Cranberry ink, and the cheek and background with Ballet Slipper ink. I love this soft look! For the poinsettia, I switched my green on this card and blended on Parsley ink for the holly leaves. I flipped the order of color on the poinsettia petals and first blended on Poppy ink, then Cranberry, and finished off the flower centers with Stardust ink. For the Nordic snowflakes, I blended the largest snowflakes on with Blueberry ink, the tiny dots in Midnight ink, and the small snowflakes in Harbor ink. I really love all the blue in this stamp! I stenciled the remaining two stamps that I didn’t use with Parsley, Evergreen, Powder, Pebble, and Mushroom inks. These can be used on a different project in the future!
I cut my stamps apart, then added the stamped stamp details from the two Postage Collage and Postage Collage Fall stamp sets in black ink. I got to work on building the rest of the card and decided to use the Snowfall card front die from Concord & 9th on some Nectar cardstock for a fun background. I fussed around with the stamps and came out with the four-stamp arrangement, and for some reason it felt really right, so I stuck with it. I added thick foam squares to the back of the Nordic snowflake and ornament stamps and added thin foam squares on the back of the other two. I thought this made things a little more interesting since the dimensions were differing, but maybe it was a weird decision haha! For the sentiment, I snuck in the ‘happy holidays’ sentiment from the Elegant Christmas stamp set. I really like the placement of it and how it pops from the light-colored elements on the card front.
Well, that wraps up this post! What do you think of these?! Do you like one more than the other?! Let me know down below! Thanks so much for stopping by today, I hope to catch you tomorrow with more Christmas inspiration! 😊
Affiliate disclaimer: all links to Waffle Flower, Concord & 9th, Altenew, Scrapbook.com, and Spellbinders products are affiliate links. These links allow me to get a commission at no extra cost to you if you use them to shop! All other links provided are links to supplies and shops I am not affiliated with and I do not get a commission from.
