

Concord & 9th—Blooms For You Bundle 3 Ways!
Hello, again!
If you’re looking for a beautiful floral set that’s great for mass production, I’ve got one you! Today I’m talking all about the Blooms For You Bundle from the August 2023 Concord & 9th release. I was lucky enough to be able to guest design this month, and I’m so excited to be sharing these projects with you today! For all the details on the supplies I used, check out the bottom of this post!

I’m kicking off this floral packed post with a blue and orange beauty! This card was actually inspired by miss Laura Bassen who had posted a video creating with Altenew florals and this color combo, so I just had to give it a try! This is my first time really creating with complementary colors (blue and orange are opposites on the color wheel which creates dramatic contrast) and I absolutely love it! I stamped the floral stamp in Nectar and the greenery stamp in Blueberry ink. I decided I needed more orange, so I stamped and die cut some Clementine flowers with Honeycomb centers. I finished the card off with a gold heat embossed ‘thank’ and a matte gold die cut ‘you’. When I tell you that this card came together quickly, I mean it! If you want quick cards and you plan to die cut florals to add dimension and color like I did here, it might be worth it to pick up a second die set so you can die cut your stamped images quicker.
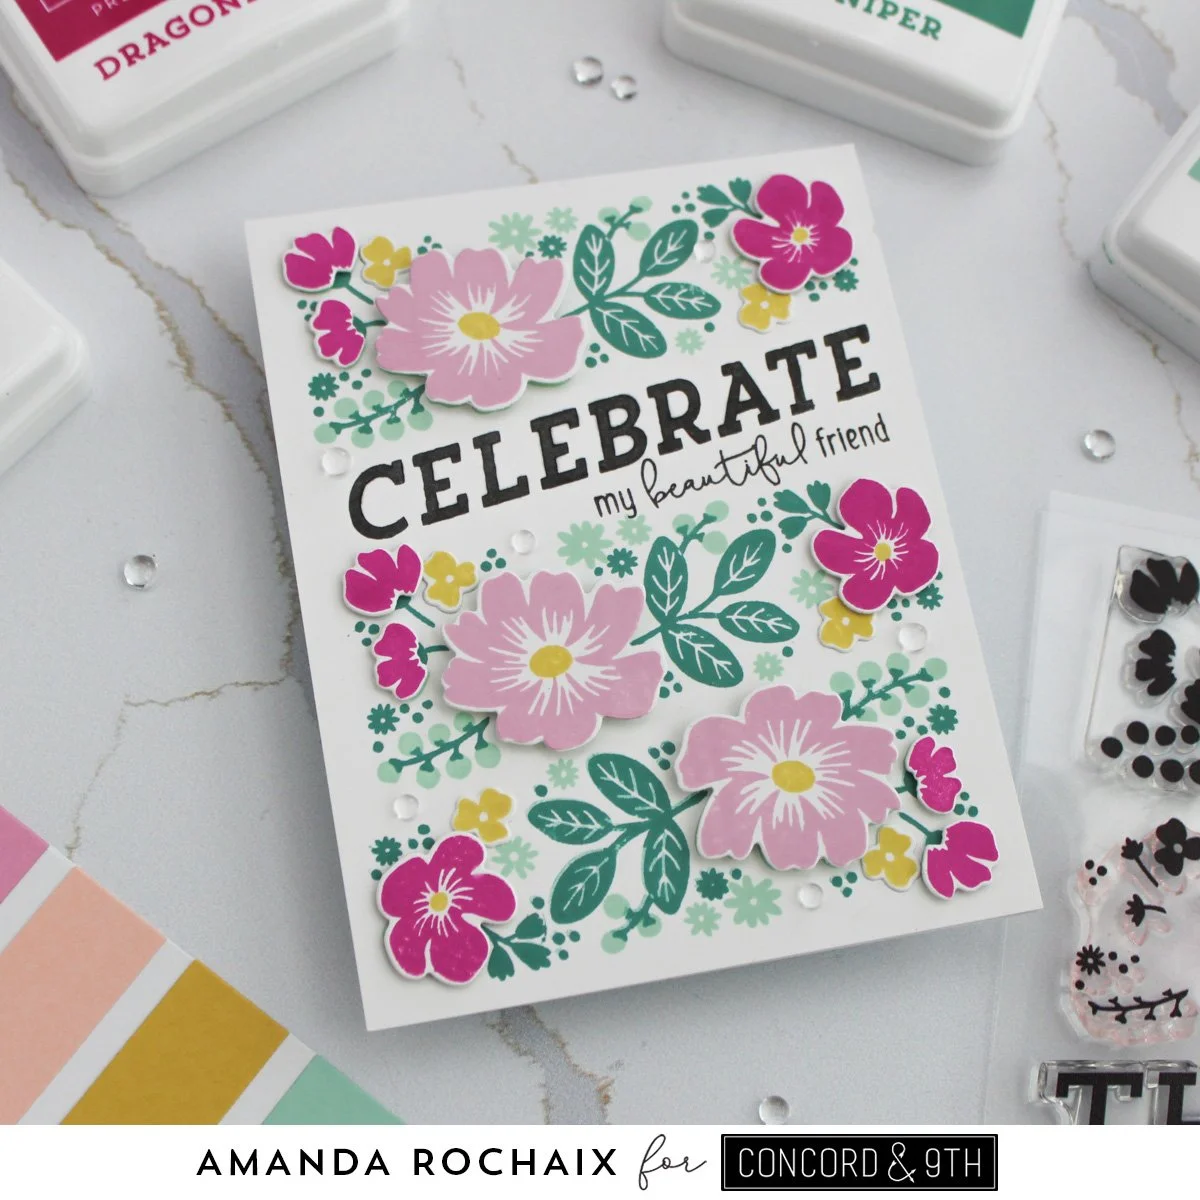
For this card I pulled out a tried-and-true color palette of mine— Sweet Pea, Carnation, Nectar, Honeycomb, Sea Glass, and Juniper. I think this is the third time I’ve used this color palette since May, and I’m still loving it! First I stamped the floral layers in Sea Glass ink on the top and bottom of the card (luckily a MISTI makes this easy as you can just flip your cardstock 180 degrees), then I stamped the leafy layers with Juniper ink. With my two main floral elements completed, I lined up the floral stamp a third time and stamped both layers the same way as above. I was hoping to make a full floral panel with this stamp, but I didn’t have enough space. I considered free stamping florals to fill in the gap, but instead decided a sentiment can go there. If you want a full floral panel, you might be able to get all 4 completed images if you line your top and bottom stamps up as close as possible to your edges.
I stamped the ‘celebrate’ sentiment from in black ink, then pulled out the ‘for my beautiful friend’ sentiment from the Celebration Squad stamp set. I masked off the ‘for’ and stamped it down at an angle. I really like how this sentiment turned out! To finish off my card, I stamped flowers in Dragonfruit, Carnation and Honeycomb inks and die cut them. I glued the Honeycomb flowers down, popped the Dragonfruit ones up on thin foam squares, then used thick foam squares on the Carnation ones. I love the dimension that doing this builds with these flowers! To finish this card off, I added some dew drops for the perfect amount of shine!
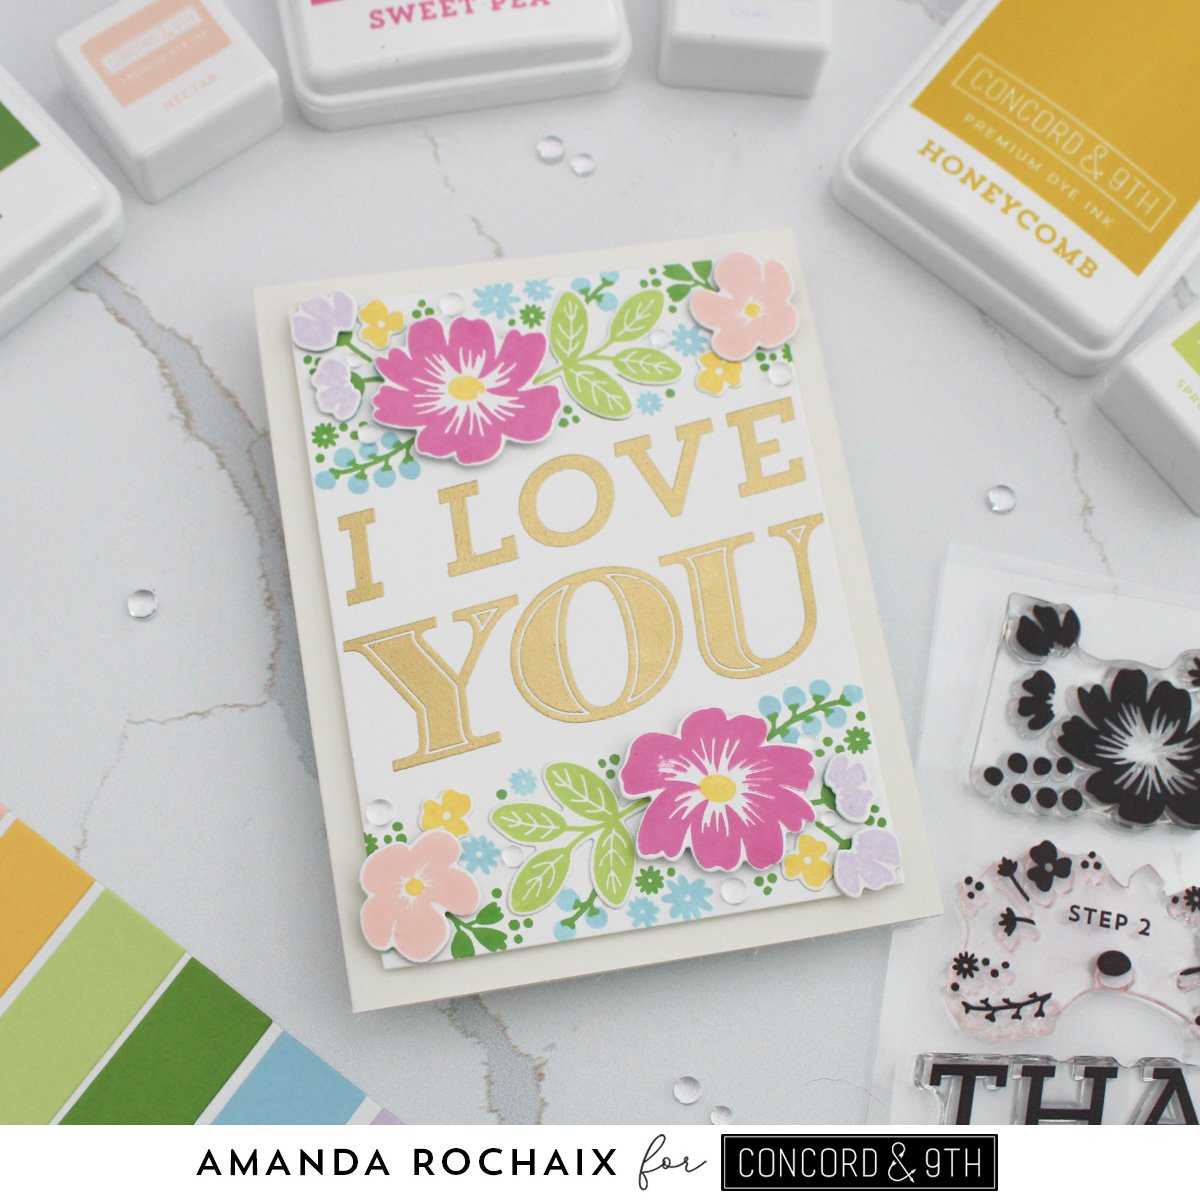
It’s hard for me to pick a favorite out of these three floral beauties, but this one might just be it. I can be very picky when it comes to bouquets (too much of one color can drive me nuts!), so I really love a balanced color palette. I used this one (Sweet Pea, Nectar, Buttercup, Sprout, Parsley, Harbor & Lilac) on a birthday card for my husband’s grandmother a couple months back, and I thought it would be perfect on this card. I stamped the floral stamp in Harbor ink, the greenery stamp in Parsley ink, then die cut the panel using one of the Waffle Flower A2 Layers dies, I’m pretty sure it cut off 1/4-inch on each side.
With my panel ready to go, I stamped and die cut my florals. Before sticking them down, I stamped and gold heat embossed the ‘I love you’ sentiment using Guilded embossing powder from Brutus Monroe. Just like the last card, I glued down my ‘further back’ elements, this case being the small Buttercup florals and the Sprout stems. I popped the Lilac and Nectar flowers up on thin foam squares and the Sweet Pea flowers up on thick foam squares. Since my panel got pretty warped when I was heat embossing my sentiment, I added a piece of cardstock behind it to strengthen it/help with the warping, then added some 3M foam tape I had on hand to the back of it. I prepped a card base out of Ivory cardstock from Simon Says Stamp, then stuck my panel down on it. After a looong time of embellishment fussing, I glued down some dew drops for some shine on this card.
That wraps up these cards! Which did you like best? All I know is this stamp set makes creating floral cards an absolute breeze! Thanks for stopping by the blog today! I hope you enjoyed these cards and that I’ll catch you next time!😊
Affiliate disclaimer: all links to Waffle Flower, Altenew, Scrapbook.com, and Spellbinders products are affiliate links. These links allow me to get a commission at no extra cost to you if you use them to shop! All other links provided are links to supplies and shops I am not affiliated with and I do not get a commission from.
