

Poshta Design— Christmas in July Day 2!
Welcome back, friends!
Today we’ve got lots of cuteness in-store for you. For me, today is a house decor day and I couldn’t love it more! These products really inspired me to make decor for my mantle, so that’s exactly what I did!
Small & Large Tabletop Tree Dies
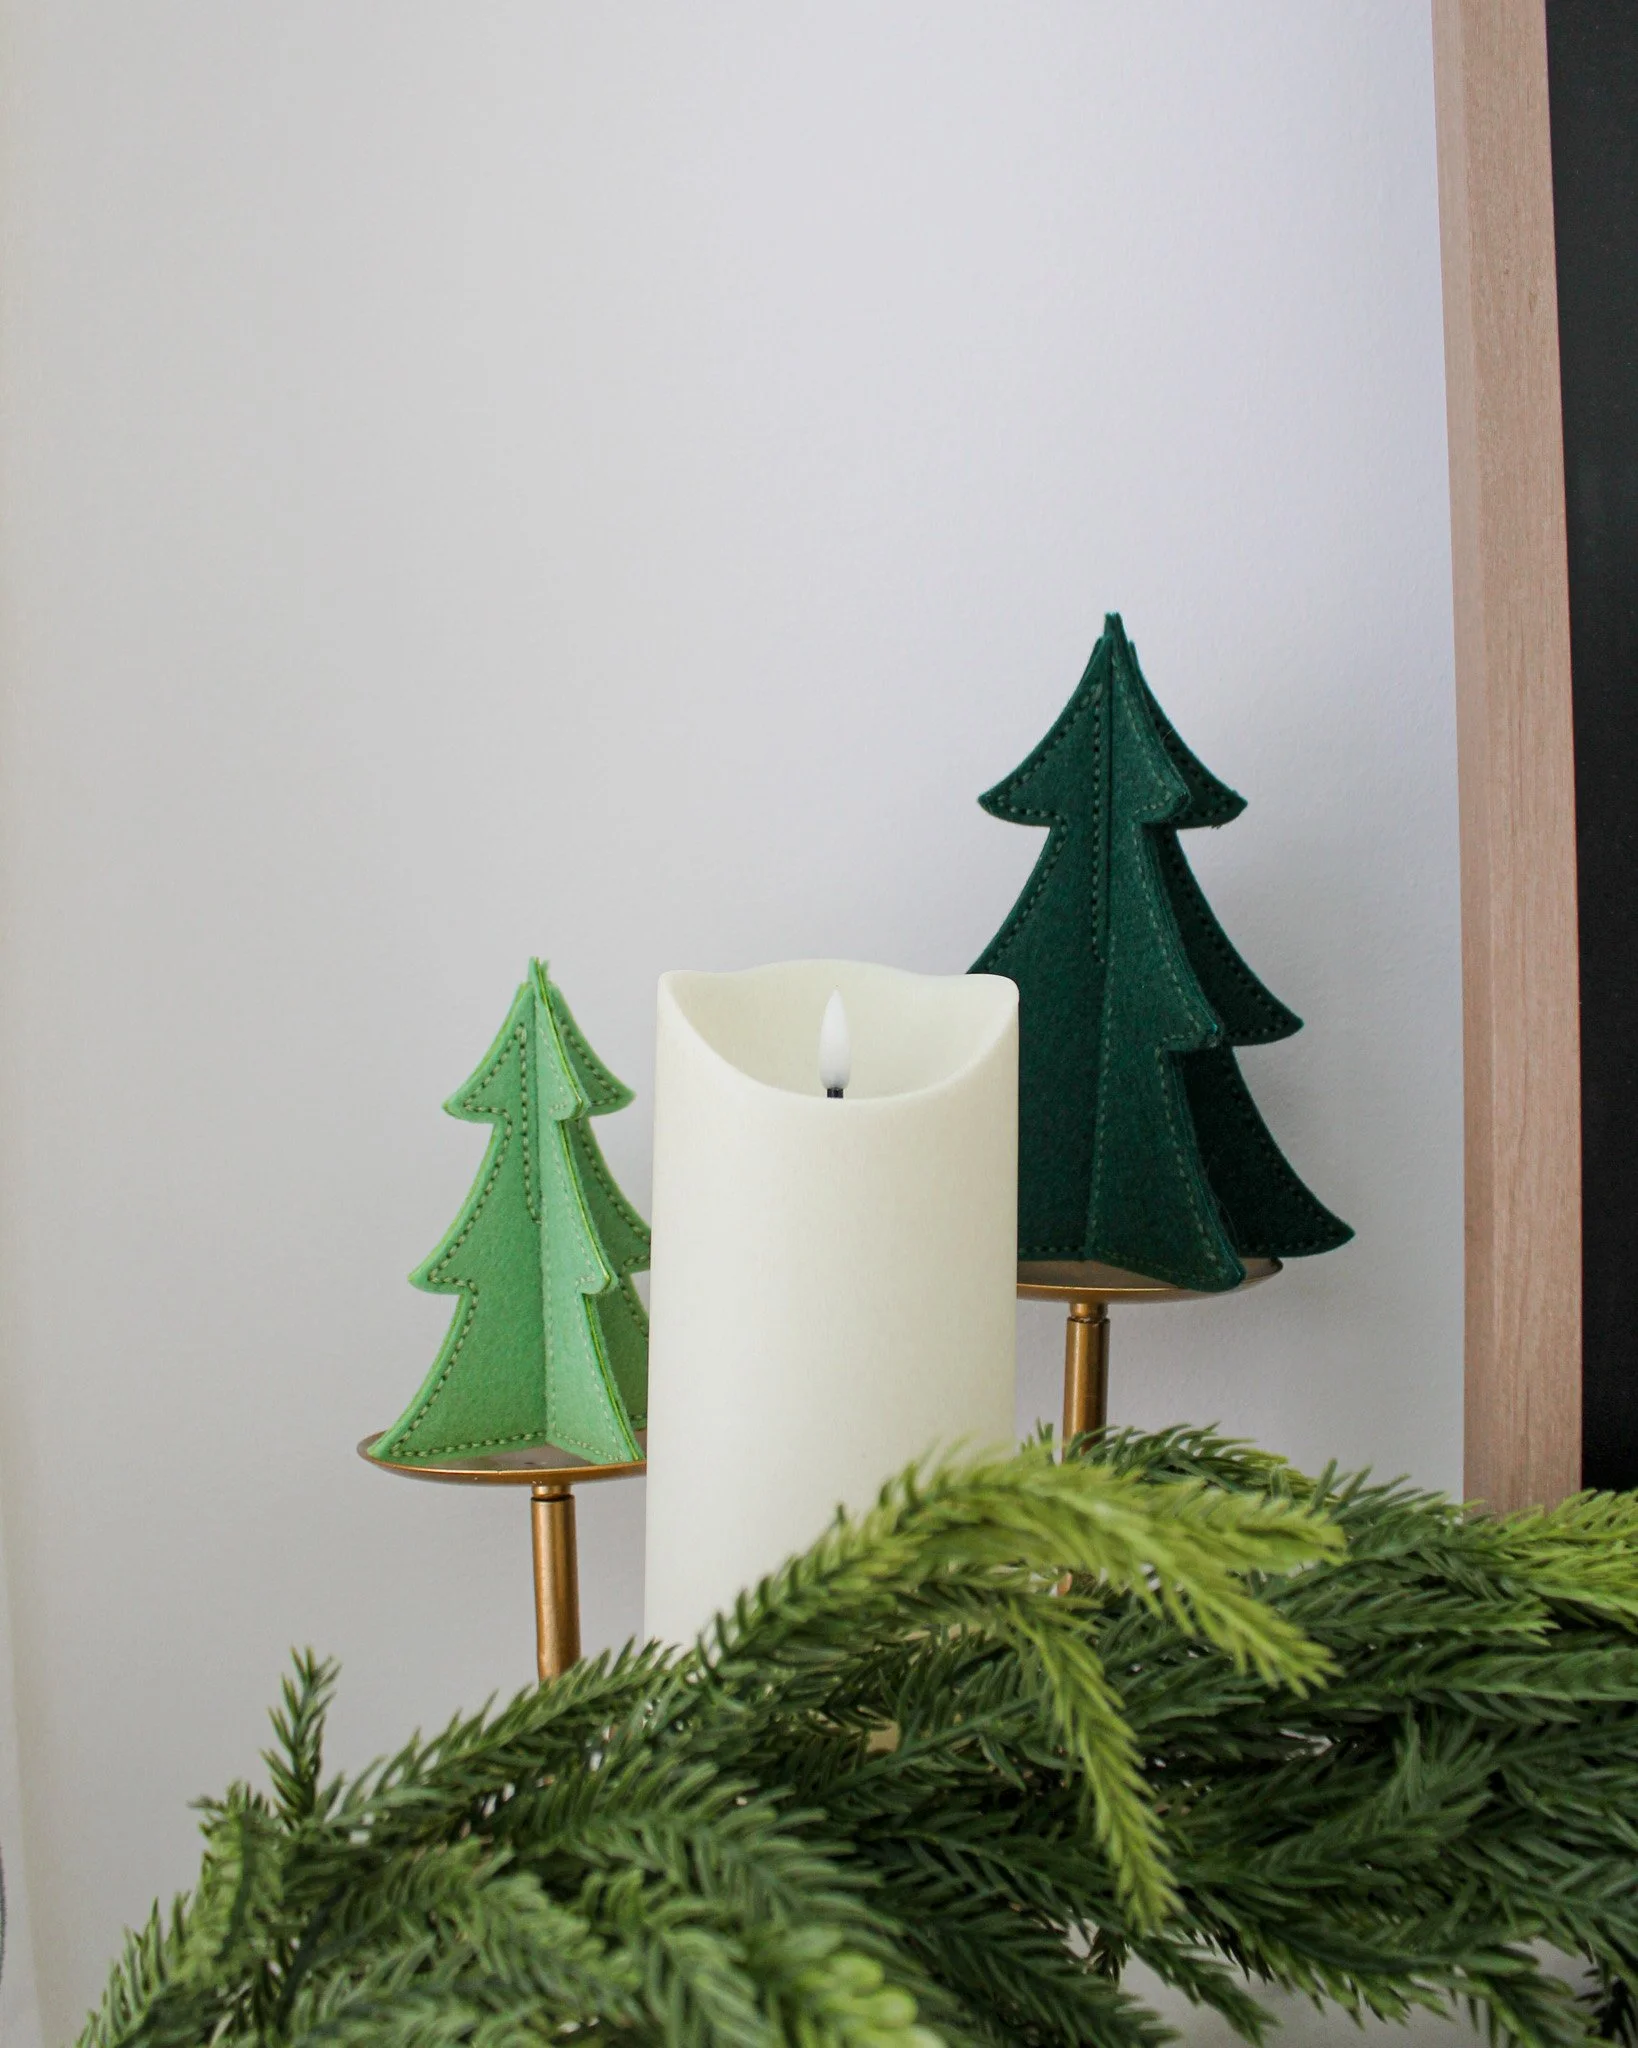
Lizzie designed this die set with lots of extras—tree toppers and ornaments—so that you could fully decorate your tabletop tree to your hearts content. I was about to do that until I was so in love with my ‘plain’ trees that I just couldn’t! These trees are so cool with how they come together by slotting into one another. It makes them stand up perfectly (when you add some thick cardstock between your felt layers), and makes storing them an absolute breeze since they store flat! I actually had them stored in a mesh pouch and tossed into a go bag when we had some threatening weather in the area last month—I wasn’t about to lose my projects!
For my large tree, I die cut it out of Pine Forest felt, and for the small one, I used Soft Jade. I love these two colors together! And now all I have to do is make an army of trees for the other side of my mantle and probably my dining room table too. How cute would it be for these cute trees to be used as placecards & table decor?!
The Candy Cane Express Garland


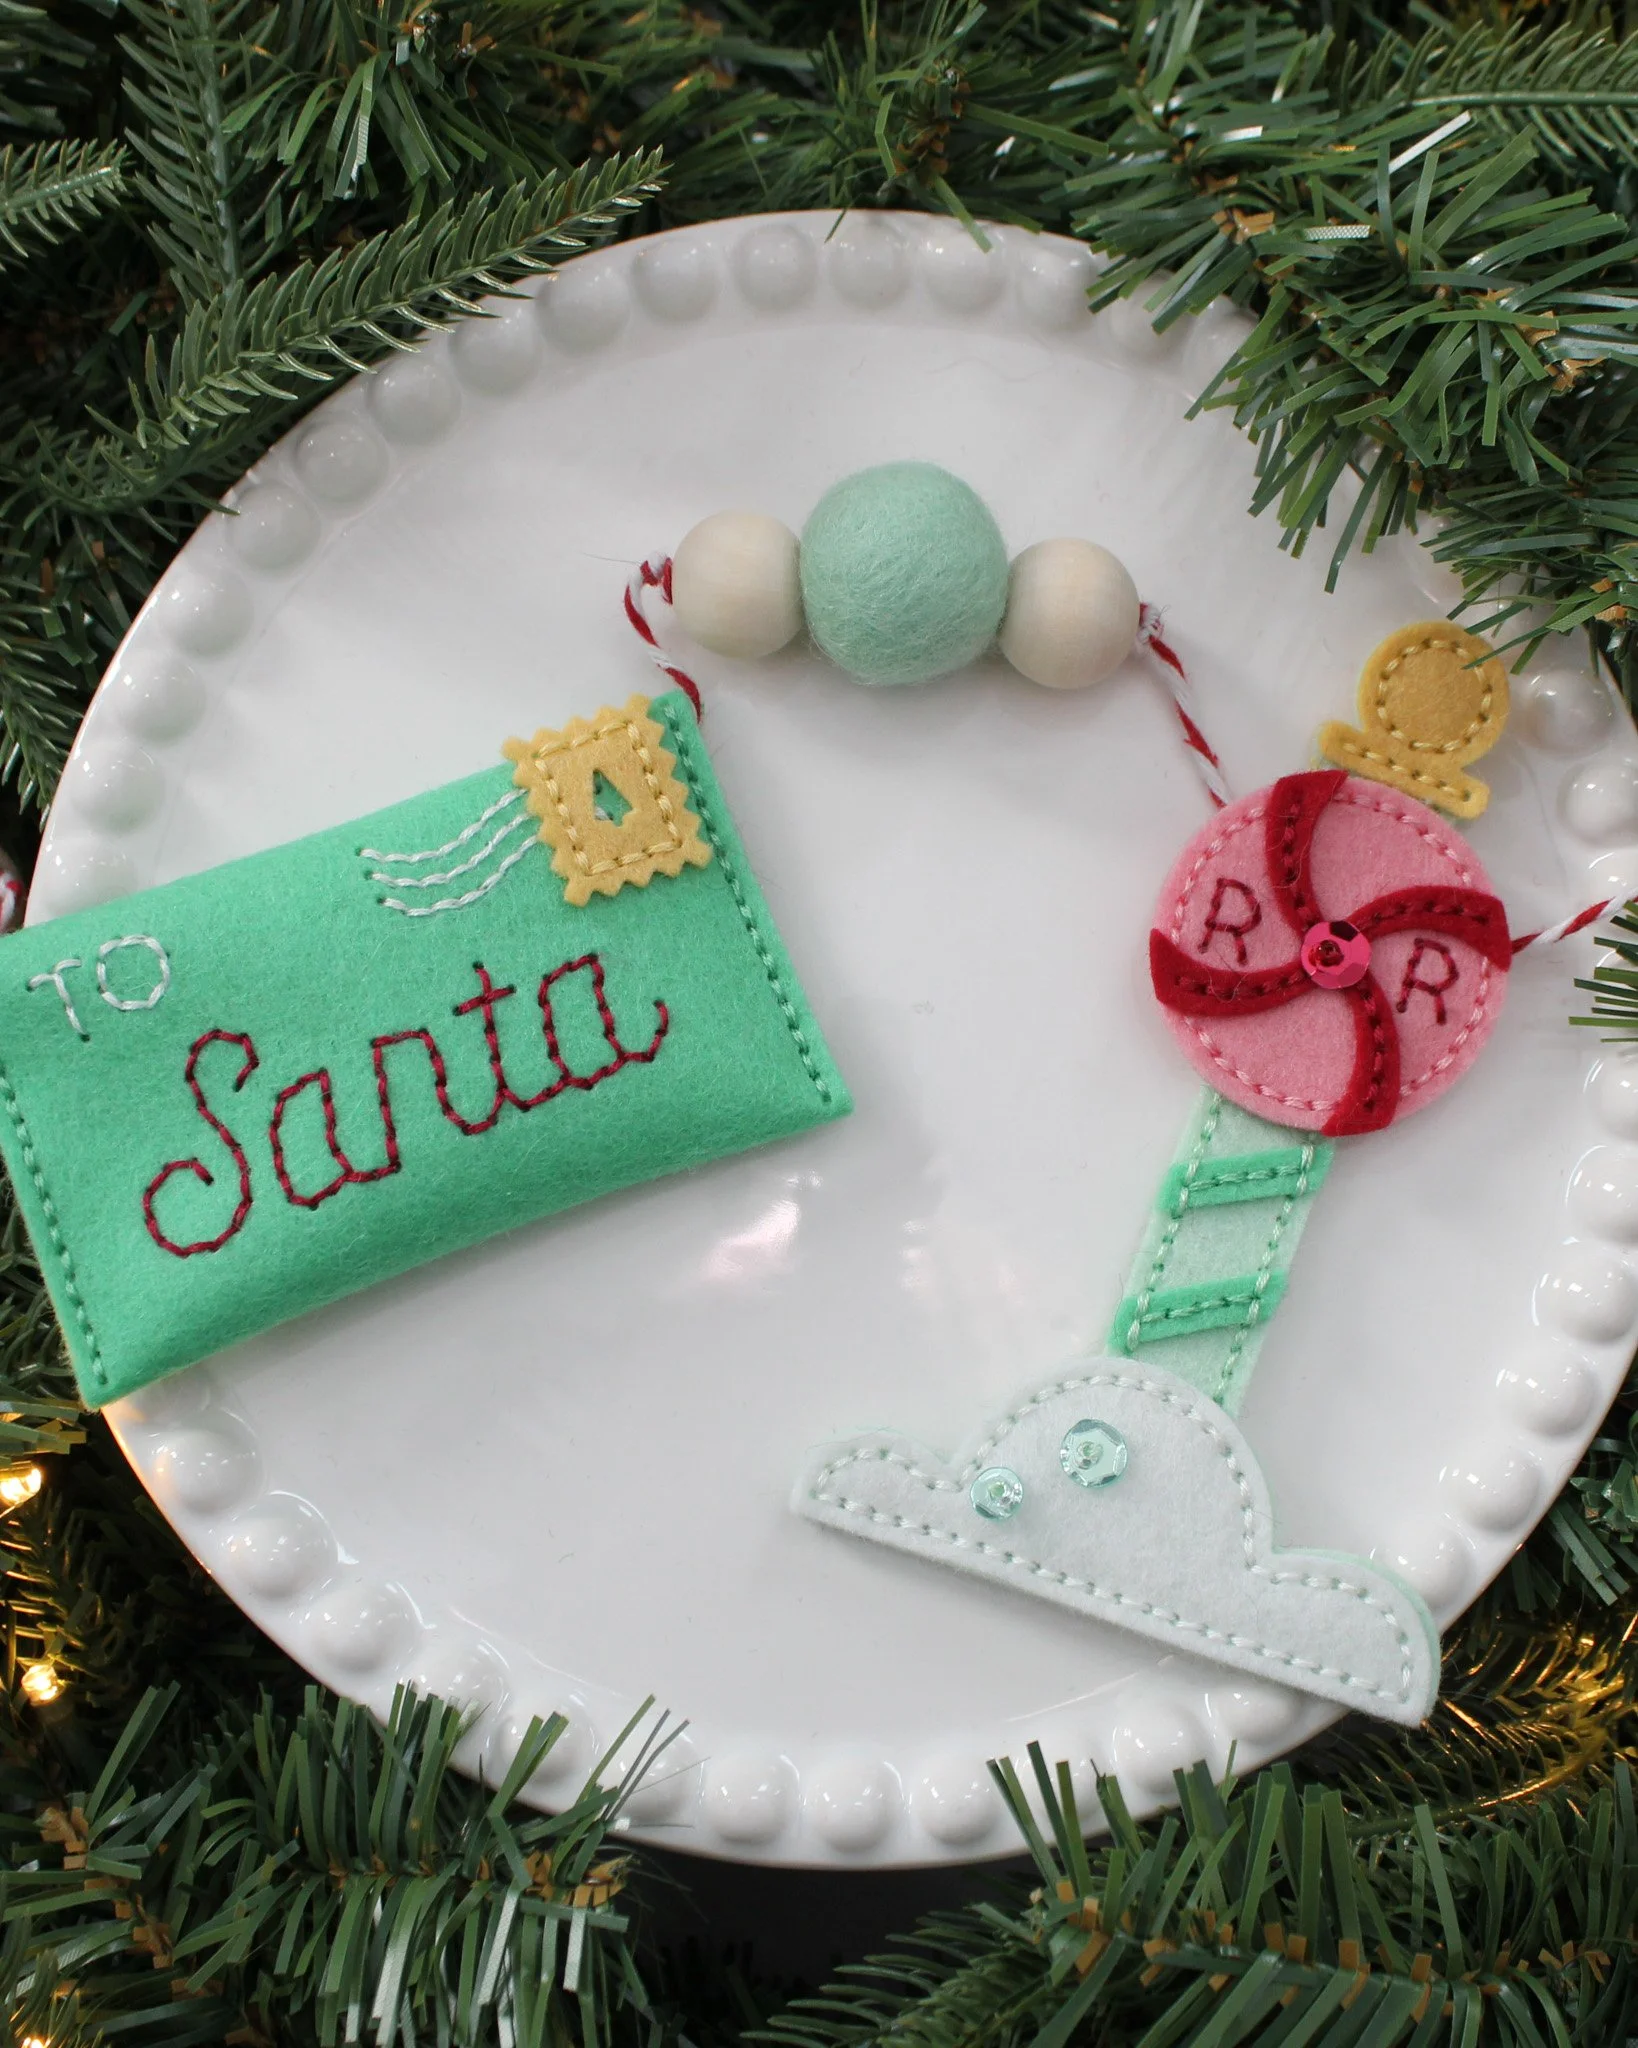
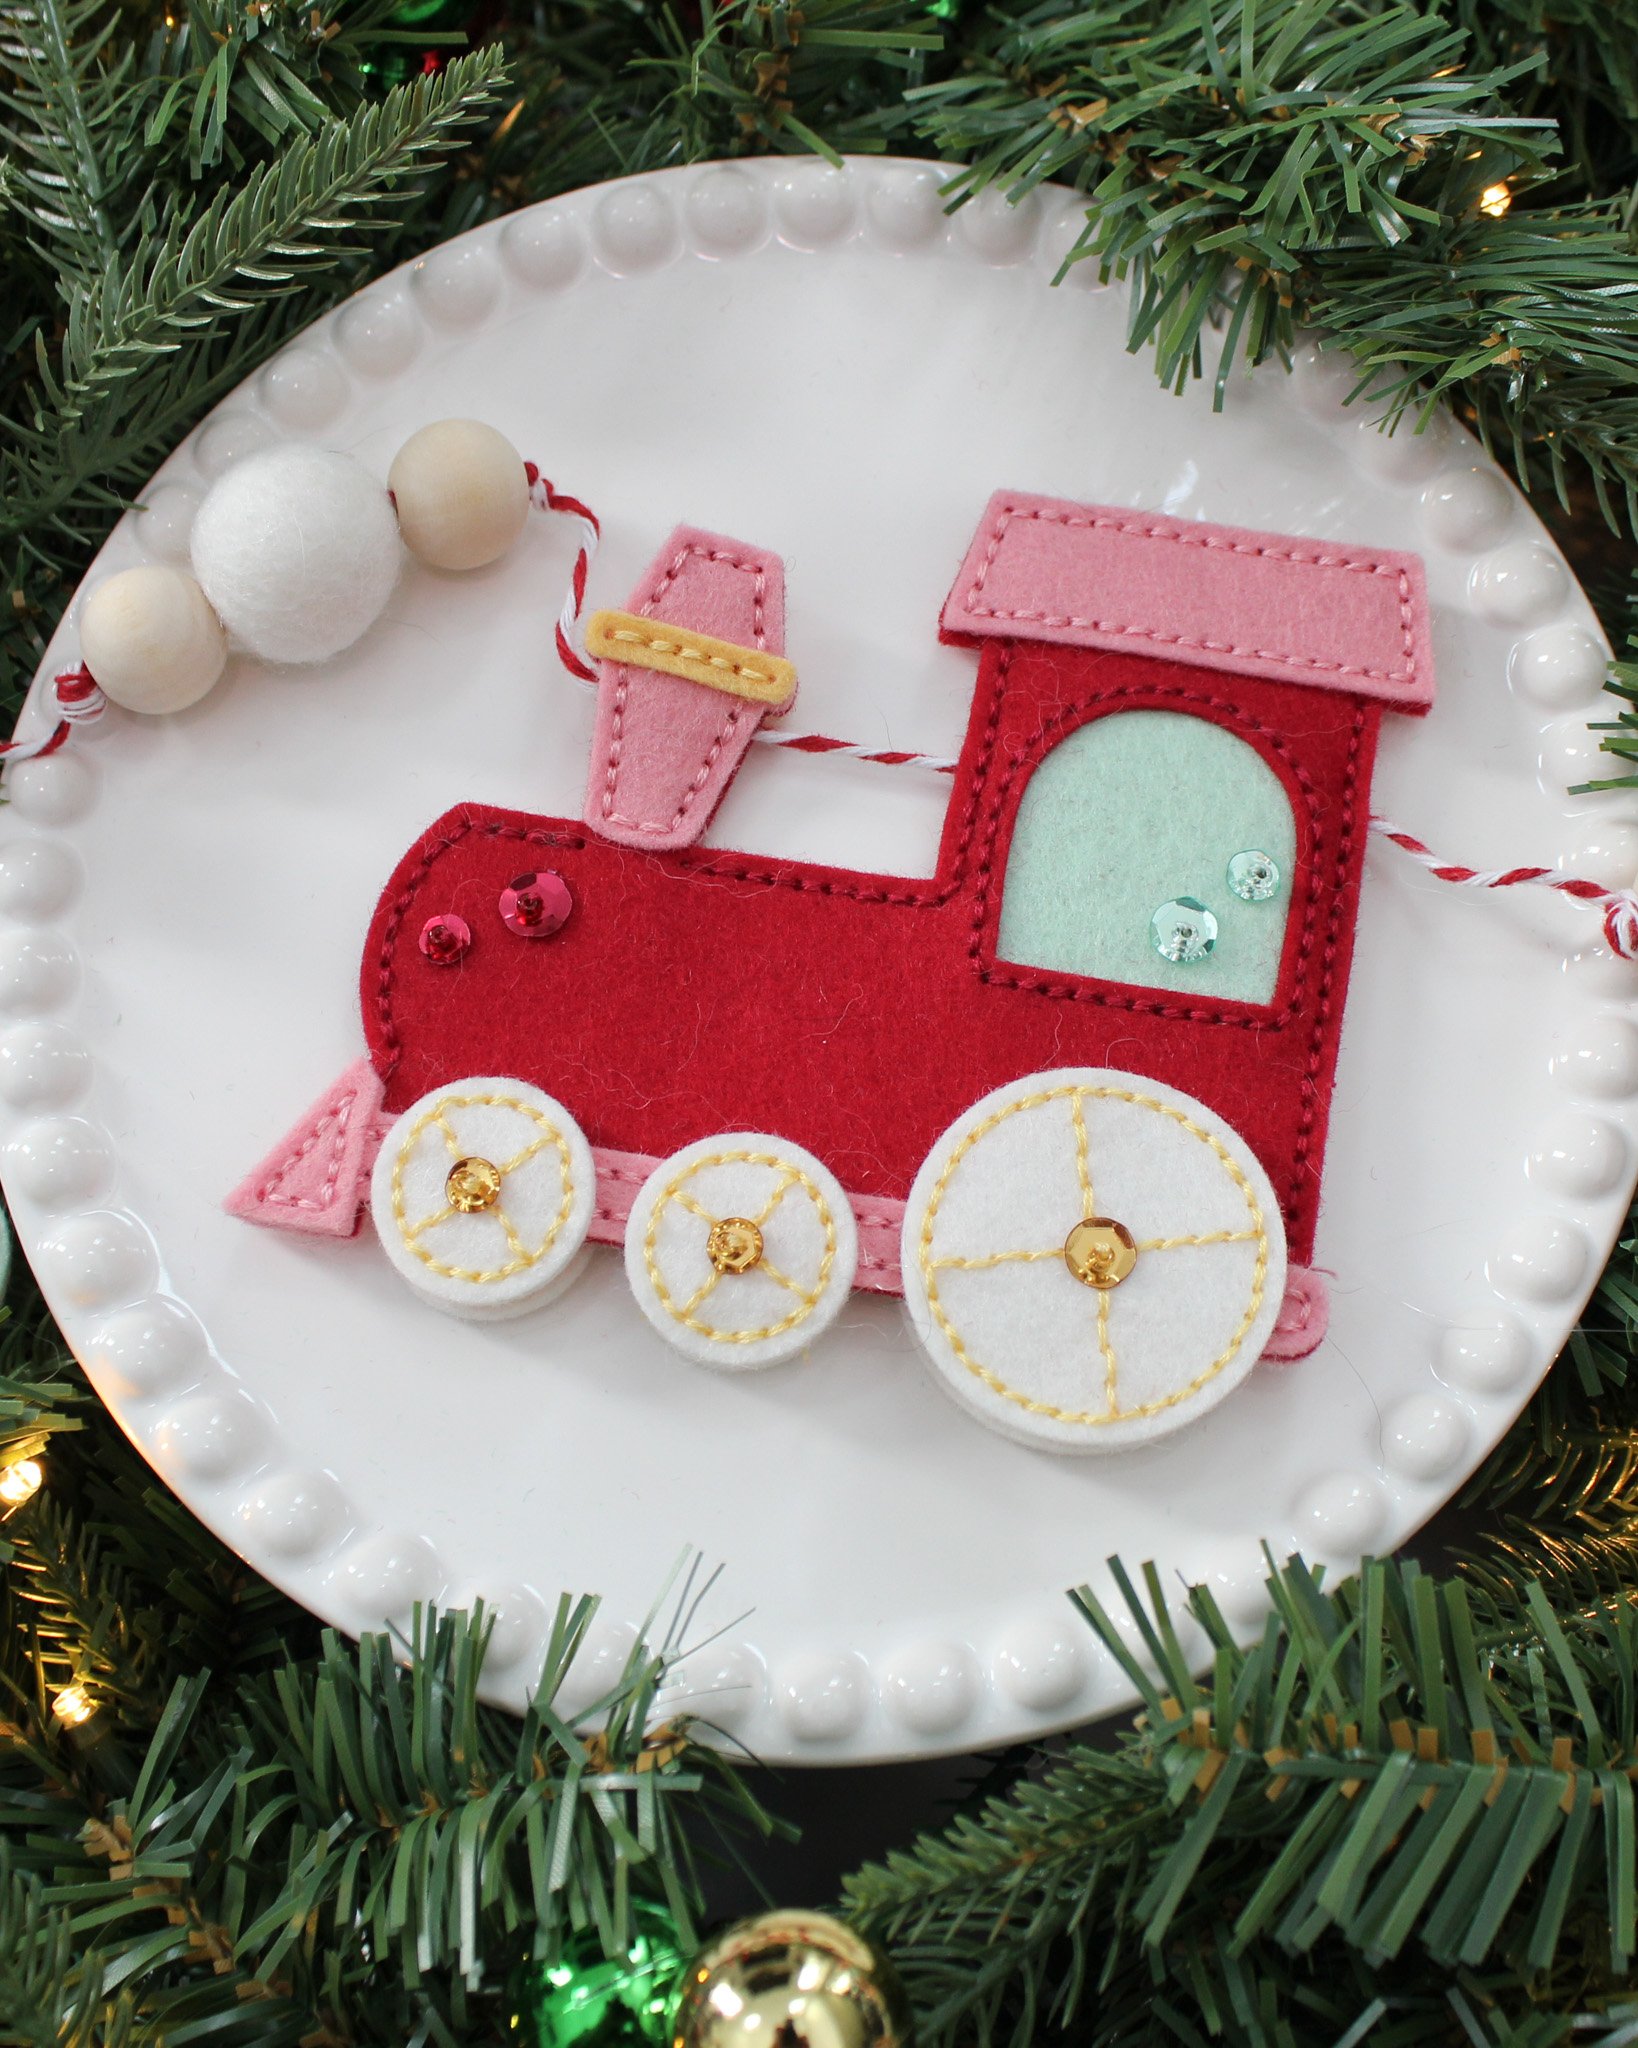


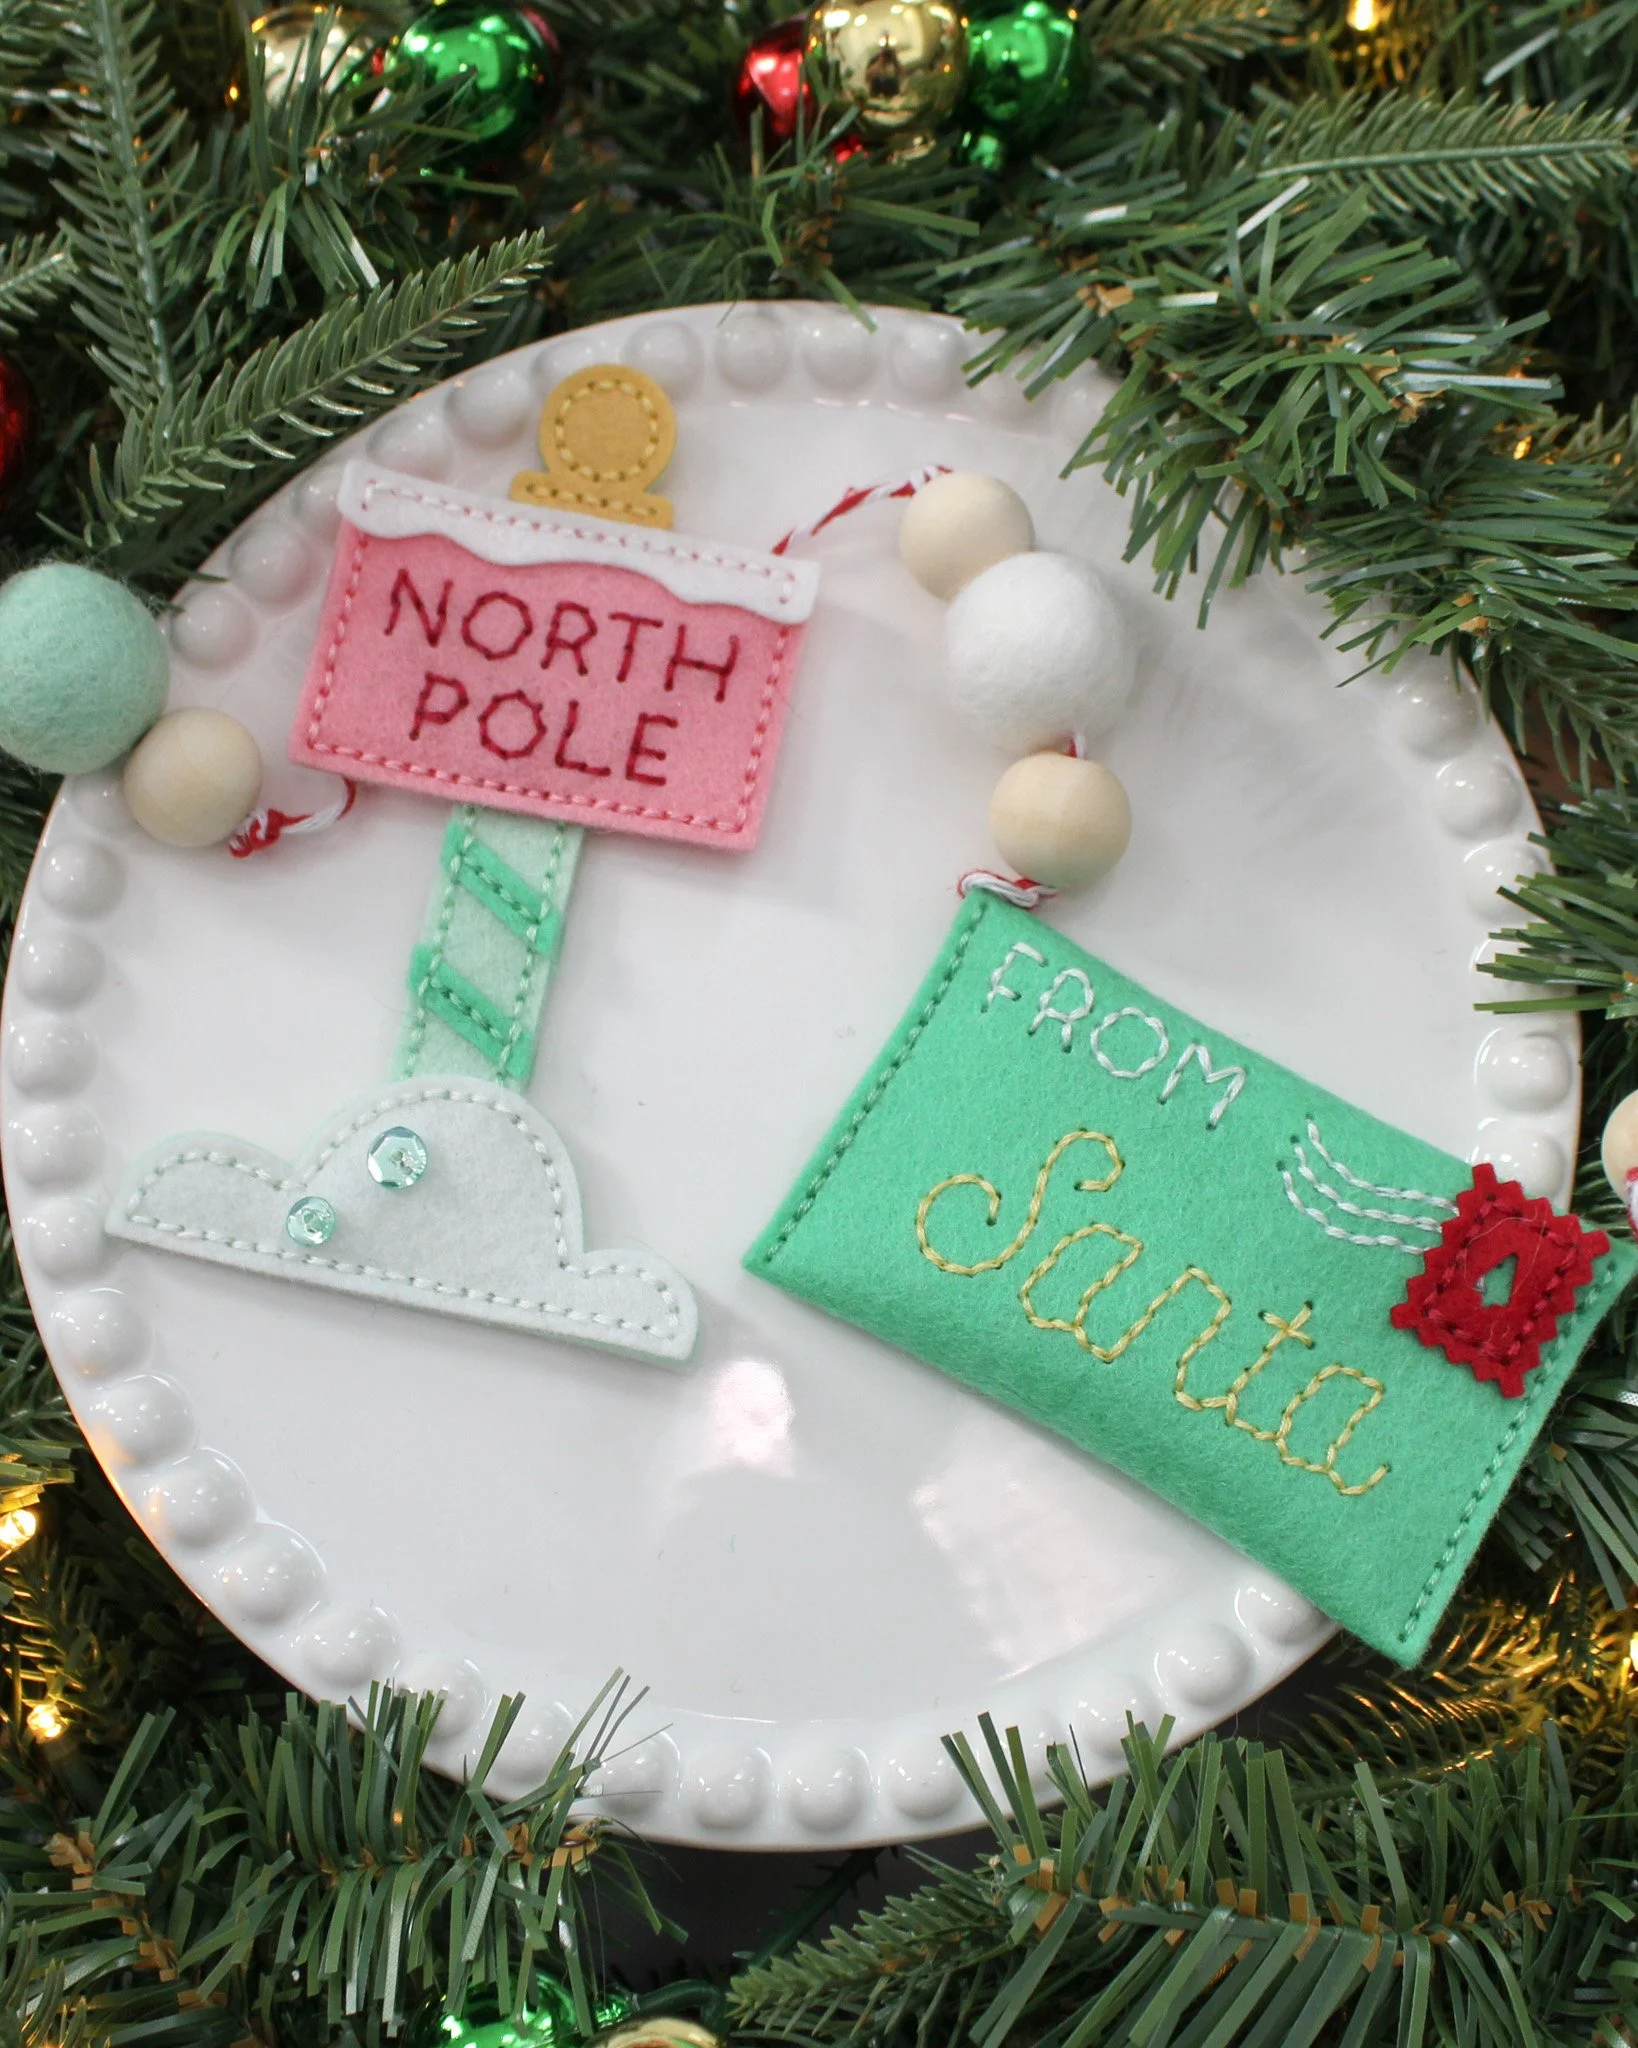
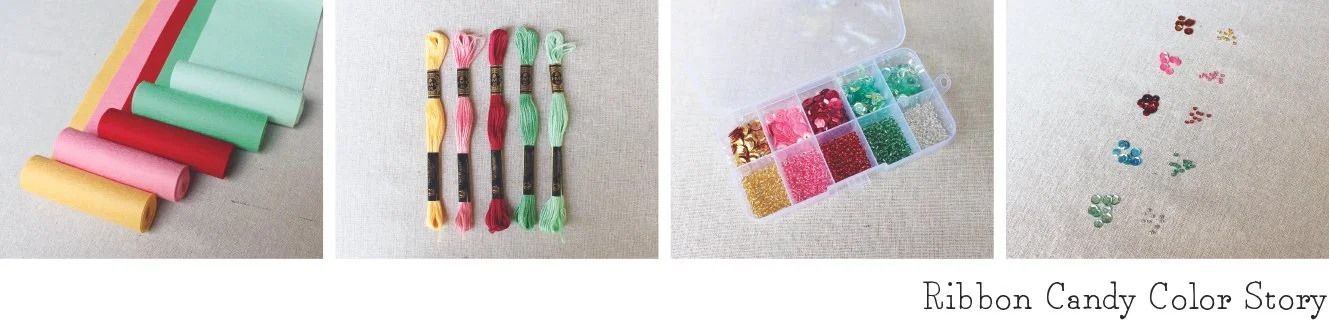
The cutest collection of train cars, North Pole signs, and Santa notes are hitting the Poshta shop this week! I’ve never made a garland before, but I felt the visceral calling to do so with this adorable collection of products. This garland heavily features the Ribbon Candy Color Story (plus some Tundra felt) and it’s just so perfect for these dies!
First, I die cut all my pieces out of the various colors of felt, not to mention alllll the little Tundra wheels! Once I had everything cut and all the little holes poked out, I started stitching the front details on (each die set does come with a printed stitching guide that shows you where to stitch and all the things you can do).
My main goal for each element was to add a little bit of shine somewhere, so most my embellishing is on the windows and wheels of the train cars, but for the cargo cars I added the shine to the presents and the tree. I love the versatility you get from these die sets and the way that you could make an absolutely massive garland just by varying the look of the train cars—so cool! I even learned how to do the lazy daisy for the passenger car and added those stitches to my presents to look like bows!
With all my fronts and backs ready to go, I could finally assemble my garland! I started off with probably about 7.5 feet of twine thinking that that would be enough, but I ran out right at the end and had to tie some extra on to make a loop 😅. So, I would say to use about 2 feet of extra length than your desired length of garland if you create one similiar to mine. Mine ended up being just over 6 feet which spans our mantle perfectly. To ensure that my garland was long enough and to add more visual interest, I decided to use some wooden beads and felt balls to break up the sections between each element, and I love the extra whimsy this brings to the garland! The way my brain works, I tried to make things cookie cutter across the board, so I started off by tying a couple knots, thread a bead, felt ball, and another bead, then tying three more knots to lock that in place. I then measured an inch from that knot, and that’s where my next element would go, and once I had it stitched on, I measured an inch from the end of it, then at that mark I repeated the knots, beads, and felt ball.
When it comes to stitching your element in place on the garland, you do it in the same way that you would stitch your ornament hanger onto your project: line the garland twine up between stitching holes then do your running stitch and it will secure it to the twine. This still allows my elements to move a little bit between beaded sections, but that doesn’t bother me! To make things go even quicker, I’m sure you could find a way to skip individually stitching each element to the twine by making a little pocket on the back of each element or adding some kind of finding to it!
I hope you enjoyed getting a look at my projects today! I’m so proud of myself that I made something so cool, and just like all my Poshta ornaments, these projects will bring me joy each year I put them up. Thanks so much for stopping by today! I’ll catch you back here tomorrow for the final day of sneaks before this incredible release hits the shop on 7/3!